Device orientation vs interface orientation

Just today I got bit by confusing device orientation and interface orientation. I really should know better. Device orientation is of course the orientation that the device is currently being held in, while interface orientation is the orientation of the running app’s user interface.

What I was trying to do was to hide the status bar while in landscape mode and show it in portrait mode for an iPhone app that operates in the 3 principal orientations: portrait, landscape left, and landscape right.

To achieve that I was using code like this:

#pragma mark - Status Bar

- (BOOL)prefersStatusBarHidden
{
    return (UIDeviceOrientationIsLandscape([[UIDevice currentDevice] orientation]));
}

#pragma mark - Orientation

- (void)willAnimateRotationToInterfaceOrientation:(UIInterfaceOrientation)toInterfaceOrientation duration:(NSTimeInterval)duration
{
    [super willAnimateRotationToInterfaceOrientation:toInterfaceOrientation duration:duration];
    
    [self setNeedsStatusBarAppearanceUpdate];
}

This works fine at first blush, especially in the simulator, but not so well in practice. First off, the app doesn’t even support all 4 possible interface orientations (the fourth being upside down portrait), so what happens when the phone is held upside down? Well the interface orientation doesn’t change from its previous orientation (most likely landscape) but the device orientation is not landscape and so the status bar appears. Bug.

But even worse, there are additional device orientations (namely face up and face down) that are neither portrait nor landscape and have no matching interface orientation. If the phone was last in landscape interface orientation and then gets laid flat on the desktop, the device orientation is no longer landscape (it is flat), and so the status bar appears. Bug again.

Just for the record, here’s the definition of UIDeviceOrientation:

typedef NS_ENUM(NSInteger, UIDeviceOrientation) {
    UIDeviceOrientationUnknown,
    UIDeviceOrientationPortrait,            // Device oriented vertically, home button on the bottom
    UIDeviceOrientationPortraitUpsideDown,  // Device oriented vertically, home button on the top
    UIDeviceOrientationLandscapeLeft,       // Device oriented horizontally, home button on the right
    UIDeviceOrientationLandscapeRight,      // Device oriented horizontally, home button on the left
    UIDeviceOrientationFaceUp,              // Device oriented flat, face up
    UIDeviceOrientationFaceDown             // Device oriented flat, face down
};

And here’s the definition for UIInterfaceOrientation:

typedef NS_ENUM(NSInteger, UIInterfaceOrientation) {
    UIInterfaceOrientationPortrait           = UIDeviceOrientationPortrait,
    UIInterfaceOrientationPortraitUpsideDown = UIDeviceOrientationPortraitUpsideDown,
    UIInterfaceOrientationLandscapeLeft      = UIDeviceOrientationLandscapeRight,
    UIInterfaceOrientationLandscapeRight     = UIDeviceOrientationLandscapeLeft
};

It’s interesting that UIInterfaceOrientation is defined in terms of UIDeviceOrientation.

TL;DR;

So what I should have been doing was this:

#pragma mark - Status Bar

- (BOOL)prefersStatusBarHidden
{
    return (UIInterfaceOrientationIsLandscape([[UIApplication sharedApplication] statusBarOrientation]));
}

This works as expected when the device is upside down or flat.
Standing Desk 1.0

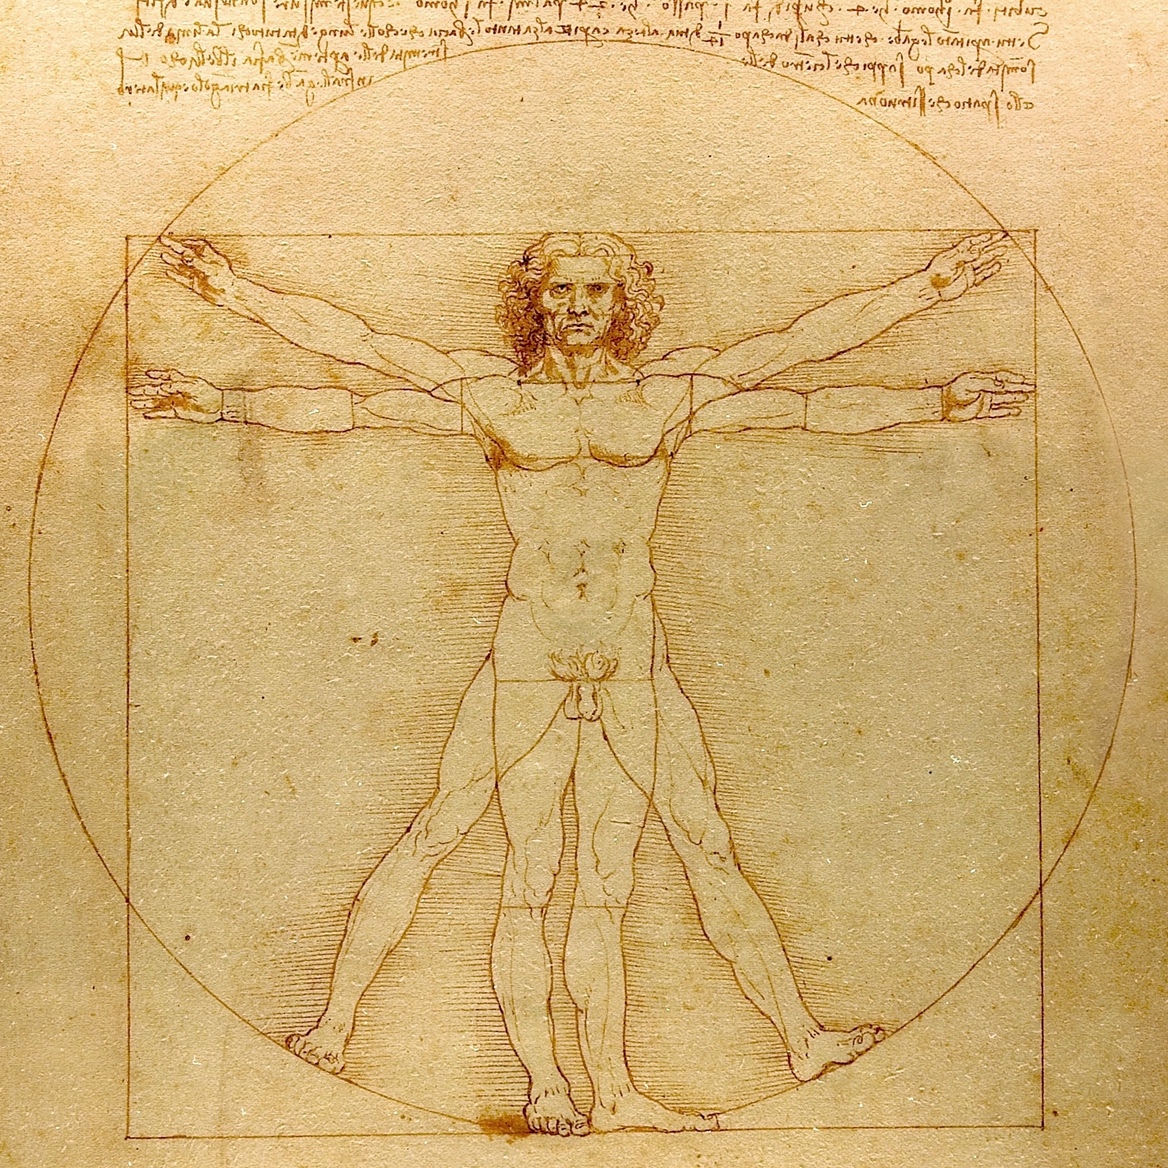
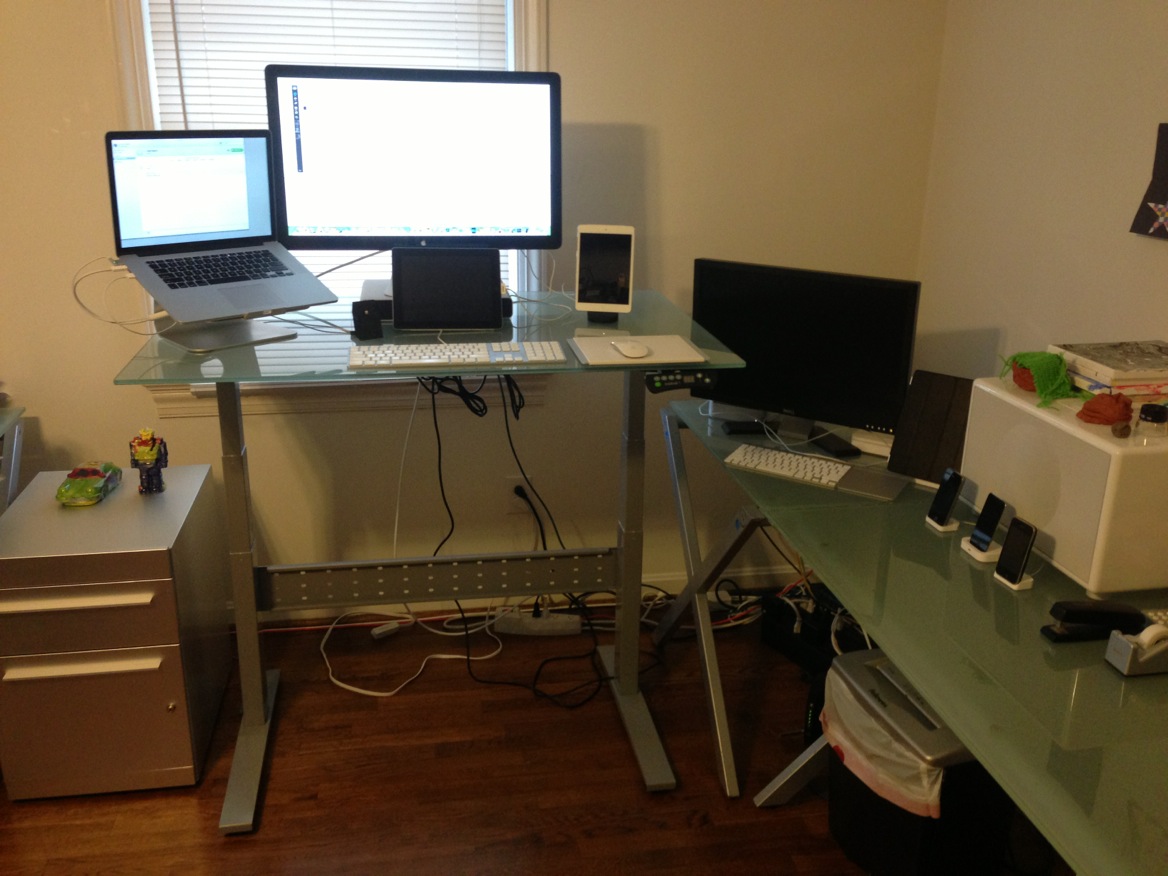
Standing positionEarly this year I purchased my first standing desk. Originally I was looking at treadmill desks as a way to help get in shape despite the long hours I spend at my desk each day. I didn’t feel like I had the time for a DIY project, so I was considering pre-built solutions such as this LifeSpan Fitness treadmill desk. Their desk seemed nice, but I had 2 problems with it. First it is fixed in height and so could never be used as a sitting desk, and second I already have 3 desks in my office that I like and the last thing I needed was a 4th desk.
The other reason I was looking at treadmill desks was because sitting at my desk was becoming increasingly more uncomfortable. I’ve been programming professionally for 15 years and sitting long hours each day the entire time. Up until last year, I would only get sore after more than 10 or 12 hours of sitting. But this past year that dropped to 8 and then 6 and then 4 hours or even less. Changing positions and getting up for stretching breaks (which I do regularly) wasn’t helping much. Sitting at my desk had literally become (forgive the pun) a pain in the ass. Of course to address this problem I didn’t need a treadmill, just a standing desk. But I figured that standing all day would quickly become just as painful as sitting all day, so what I really needed was an adjustable desk. (LifeSpan and other companies also sell standing desk treadmills without the desk, so I could always add a treadmill later.)

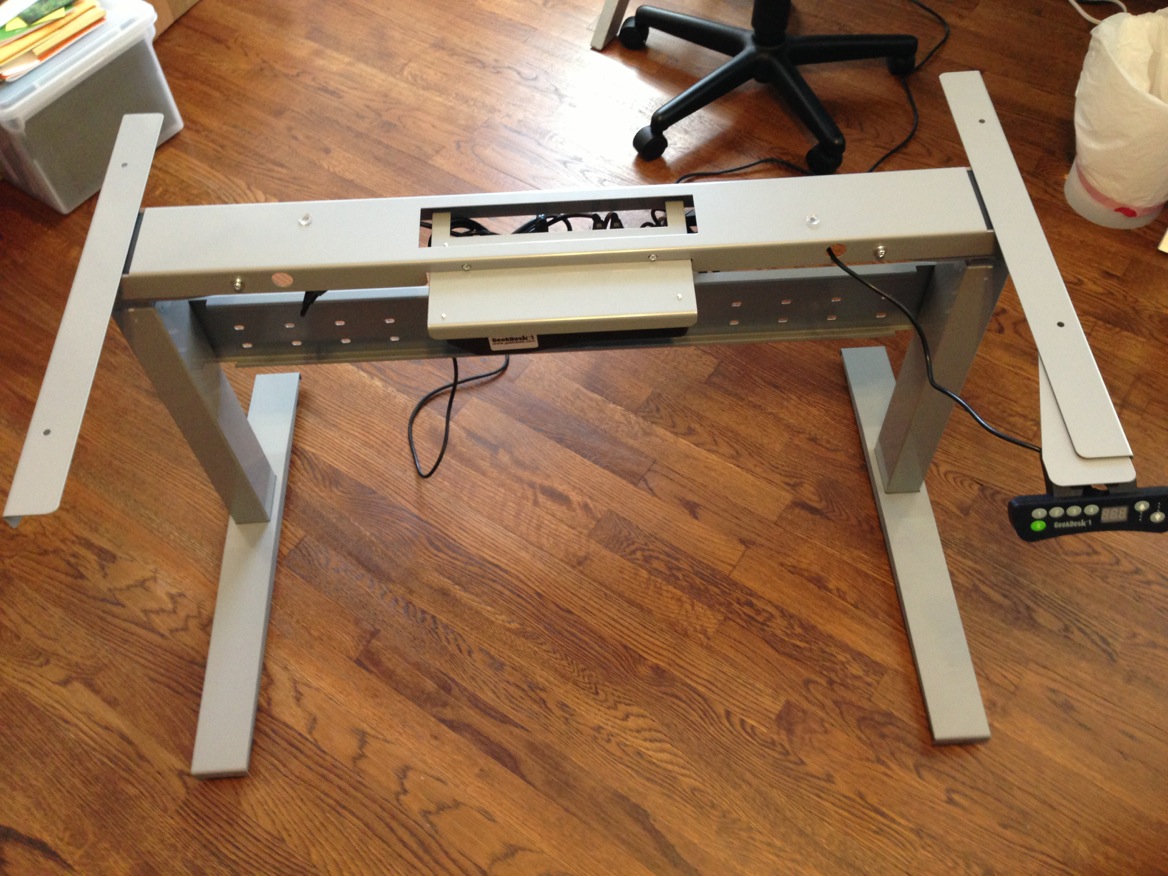
So after some research I decided to get a GeekDesk without a top and reuse the existing glass top from one of my desks, and just swap out the existing frame for the GeekDesk one. I chose the more expensive Max version mainly for the programmable presets, and I chose a small frame to fit one of my two 120 cm desks (I could have gotten a large frame for my 160 cm desk).  Using my own top saved me $264 between reduced price and reduced shipping.

GeekDesk Max frameCustomer service at GeekDesk was great and my desk arrived promptly. You assemble it yourself, but that’s easy and the build quality is great.  Adding your own glass top is probably even easier than adding your own wood top because you can assemble the desk upright and merely set the glass top in place. The one thing you need are little rubber / silicone pads to put in between the metal frame and the glass top. These cushion the top but also provide the necessary friction so that the top will not slide sideways with pressure. Fortunately I already had these from my previous desk frame.
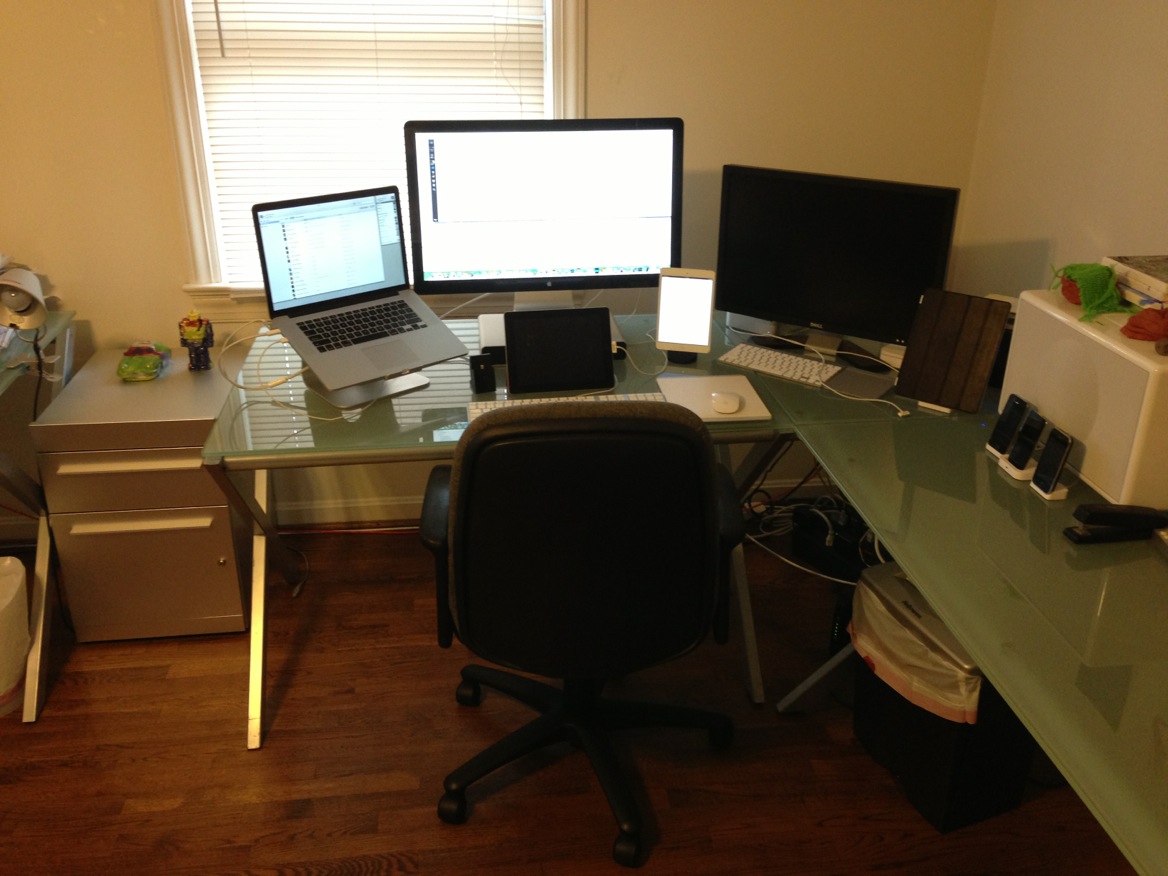
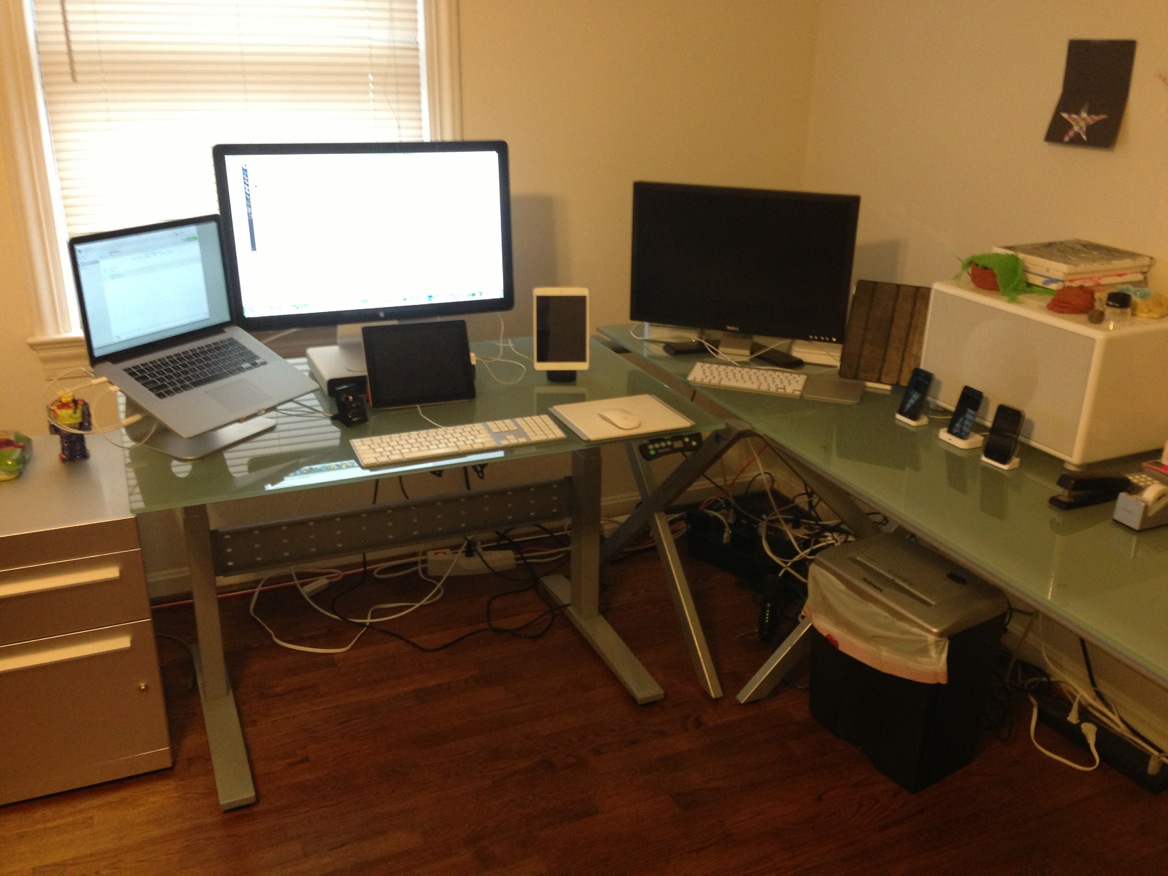
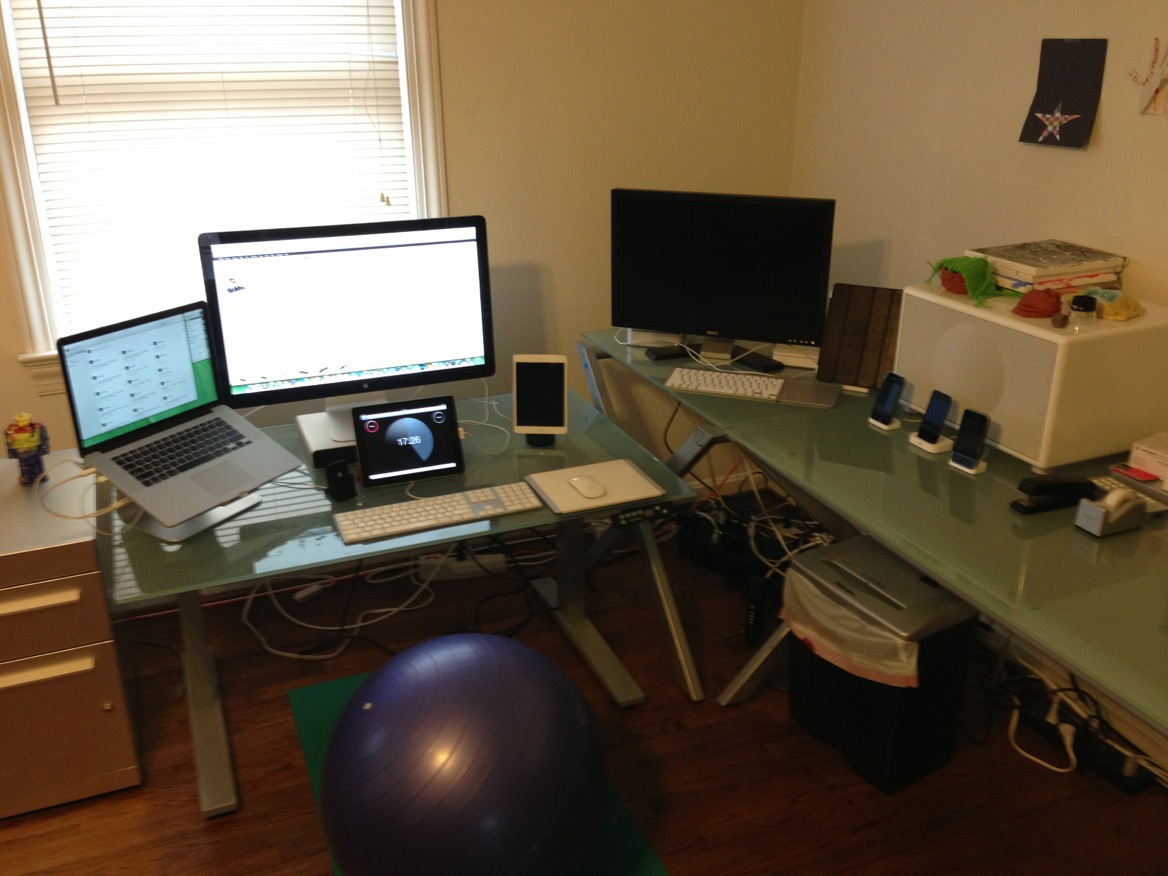
When the desk is in seated position the before (above) and after (below) appearance is practically unchanged.

Before
After

In Use

At first, I was changing positions every 30 minutes using a timer to remind me. I rotated between 3 positions: sitting in a chair, standing, and sitting on a balance ball (with the desk in its lowest position). Changing so frequently was no doubt overkill and most of the time I had trouble focusing properly while standing. Working while sitting is a hard habit to break. 9 months later I still sit most of the day, but once or twice a day I will move the desk  into standing position and stand for a while. I probably ought to change more often. I still find it hard to concentrate while standing, so whenever I’m faced with a particularly difficult problem to solve, I always have an urge to sit. Overall I’m very happy with the purchase and glad I have the option to shift my work position upon demand. Maybe next year will be the year I am able to add a treadmill into the mix.

Lowest position

CocoaConf San Jose wrap-up

This past weekend I had the pleasure of attending and speaking at CocoaConf San Jose. This was the 6th CocoaConf event I’ve attended, and I believe it was one of the best. Highlights for me included:

  • Matt Drance‘s opening keynote where he discussed the importance of people in our work: our customers (users), our co-workers, and ourselves. This is something that we as engineers can often lose sight of.
  • Jaimee Newberry‘s session on brainstorming. Jaimee is a fantastic speaker and always fun to watch, and there was plenty of info on how to manage and get the most out of brainstorming sessions, which I’d like to try on my next project.
  • Ben Lachman‘s session on prototyping, which covered a variety of tools and workflows and included a demo of the yet to be released Briefs 2 (which I plan on buying as soon as it is available. Seriously, just take my money already!).
  • Marcus Zarra‘s session on the MVC-N design pattern, which contained a strong admonition against relying on 3rd party code (especially networking code). This is going to change how I approach the next client project I manage. This talk alone made attending the conference worthwhile.
  • Daniel Pasco‘s session on the long road and various pitfalls encountered in transforming his company, Black Pixel, from a client-work company into a product company (Black Pixel makes the excellent Kaleidoscope 2 — you should buy it). Valuable lessons for anyone seeking to go indie.

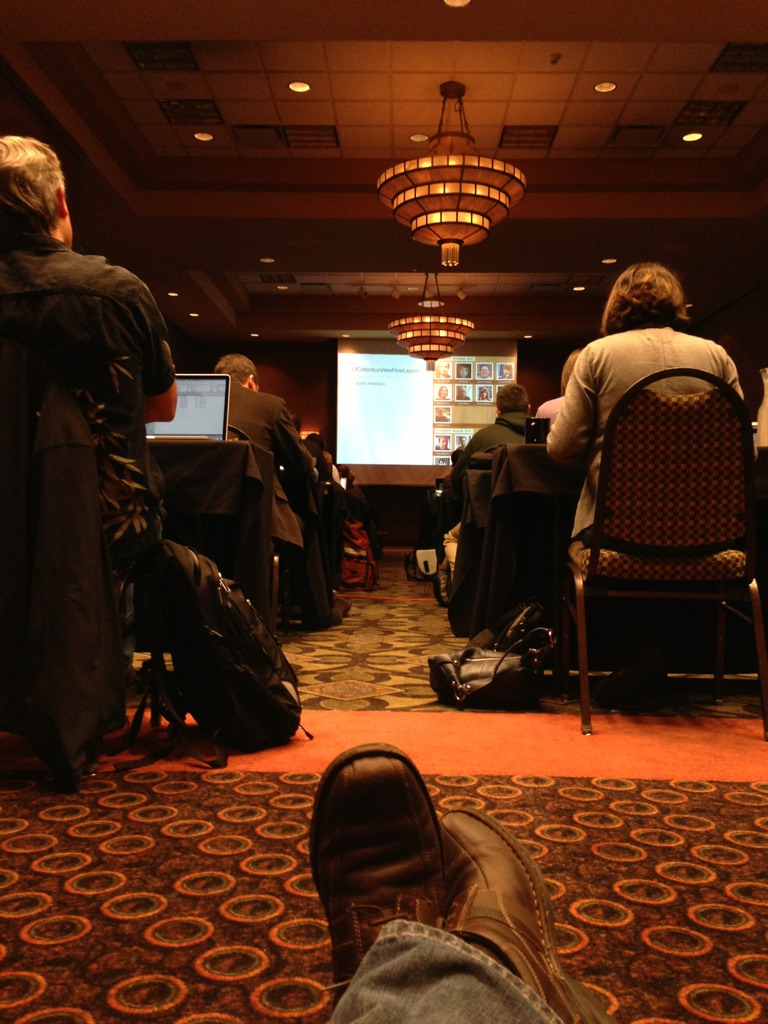
I presented 2 talks of my own. Thursday evening I delivered a talk on UICollectionView. This was the 4th (and probably final) time I delivered this talk over the past 6 months. The sample app (which contains 5 different layouts and multiple examples of advanced customizations) is available on GitHub here, while the slides can be downloaded here.

photo pinch

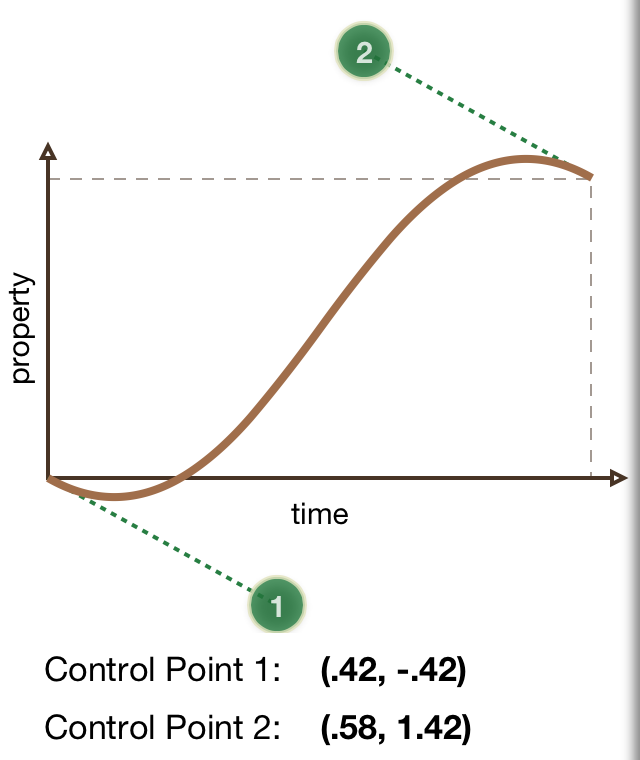
Saturday morning I presented “Animation: From 0 to Awesome in 90 Minutes”, which is an animation talk that begins with some design principles of animation (drawn from Phil Letourneau’s portion of our joint animation session at Renaissance), proceeds to discuss UIKit and Core Animation (and the limitations of UIKit), then takes a close-up look at flipping and folding animations, and wraps up with some general graphical performance tips. This talk is sort of an evolution of both the Renaissance talk and my Enter The Matrix: Reloaded sessions from 2012, and yet is also its own thing. I debuted it last month at CocoaConf DC and this was its second iteration. The sample app is available on GitHub here, while the slides are available for download here. My favorite portion of the app is the touch-enabled timing curve widget that lets you create custom cubic bezier curves by dragging 2 control points (and shows you their values). I think that was also one of the big takeaways from the talk: that you can have an animation overshoot its endpoint and then snap back by simply applying the right timing curve to a basic animation with no need for multiple or keyframe animations.

Timing curve

This wraps up the CocoaConf Spring Tour and my own 3 conference “Spring Tour” as well. I plan to take the summer off from speaking and pick it up again in the Fall.

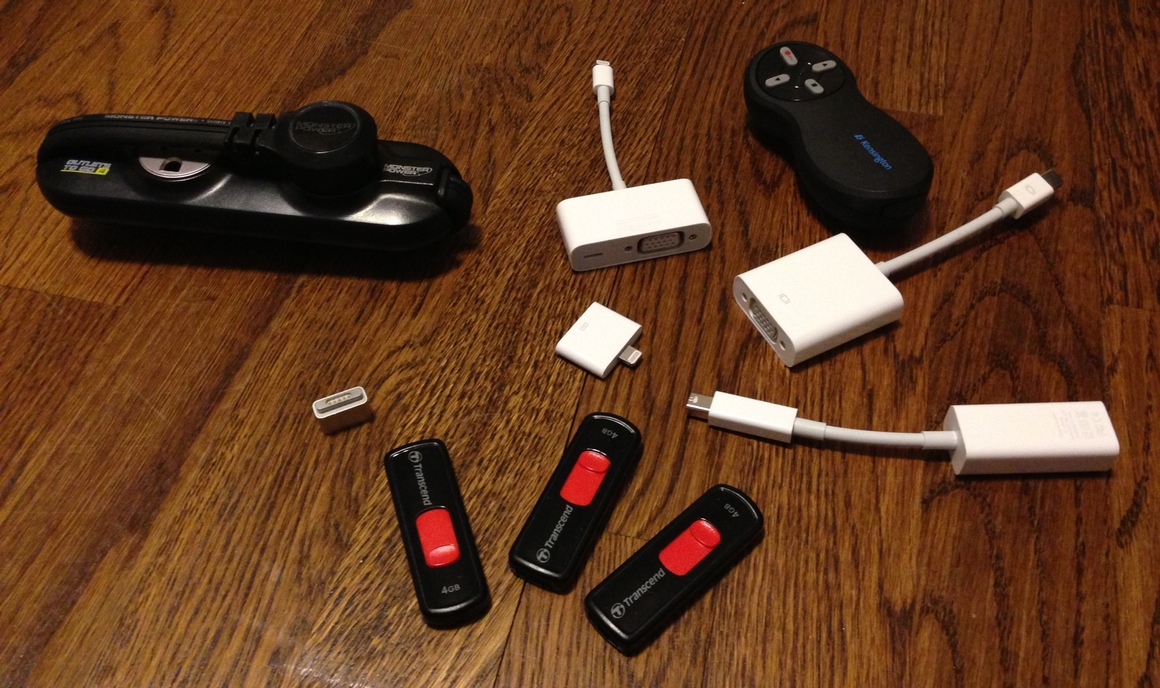
Speaker kit

Gear
I thought I might list the gear I pack when presenting at conferences

  • 15″ retina MacBook Pro — my favorite Mac ever. Great for presenting, coding, and preparing slide decks
  • iPhone 5 (AT&T) — my constant companion. Tethering via Personal Hotspot usually beats hotel / conference WiFi every time. Also, I often run Presentation Clock on it while I’m speaking to help me budget my time (propped up by a Glif).
  • iPad mini with Verizon LTE — often my demo device. The non-retina screen actually makes for a better presentation device. Also an alternate tethering source for internet. Having both AT&T and Verizon as data options helps cover all the bases. Recently I’ve had luck running demos on the iPad mini while displaying via AirPlay and Reflector.app back onto my MacBook all driven by the iPad’s Personal Hotspot. This lets me avoid Xcode and the iOS Simulator during presentations.
  • Kensington wireless presenter (with extra lithium batteries) — rock solid and works great and means I’m not tied to my laptop or the podium.
  • 3 x 4 GB USB thumb drives — for distributing slides and sample code at the beginning of the talk (have I mentioned that conference WiFi is usually terrible?)
  • Mophie juice pack with charging cable — I could probably leave this at home, but it’s nice to have a backup and offering power is a great way to meet people.
  • 2 Lightning to USB cables — for charging phone and iPad simultaneously. Or for debugging (perhaps running Instruments on) an iOS device during a demo.
  • 2 x 12W USB Power Adapter — why would I cart these larger iPad chargers around when traveling? Well I figure you often only get a limited amount of time with an outlet, so you need to make that time count. For that reason I actually upgraded to the 12W adapters (the ones that come with the iPad 4) from the 10W adapters that accompanied the first 3 iPads, merely for the modest gain in charging time. Having 2 means I can charge the iPad and iPhone simultaneously or else the iPad and the Mophie (typically what I do overnight)
  • 1 x 5W USB Power Adaptor — so why bring this one at all? Well, I hate having to remember to swap devices between a limited number of chargers. This allows me to charge my iPhone plus the iPad and the Mophie overnight, so they all start each day fully charged.
  • 4 outlet portable power strip — great for many hotel rooms that often offer only a single outlet in any one place. This lets me plug in all 3 chargers plus charge my MacBook.
  • Lightning to VGA Adapter — in case I need to do VGA out directly from my iPhone or iPad. This is strictly a contingency plan. But also nice that you can do so while debugging or running Instruments via the integrated Lightning port (this used to be a feature limited to the HDMI adapter).
  • mini-displayPort to VGA adapter — for connecting my MacBook to the projector. Typically the conference always provides these but you should always carry your own.
  • MagSafe to MagSafe 2 Converter — in case the power adapter at the podium / presenter’s table is the original MagSafe. Lately though, conferences have been supplying both flavors!
  • Thunderbolt to Ethernet adapter — this is really more of a WWDC thing, but you never know when you’ll need access to ethernet.
  • Lightning to 30-pin Adapter — I’m only carrying Lightning devices and cables, but this is just in case I need to charge from a 30-pin cable (perhaps when riding in a car; I haven’t upgraded my car chargers to Lightning since my wife is still on an iPhone 4S)

So that’s what I’m currently carrying to conferences. I enjoy the convenience of leaving my full-sized iPads at home and only having to bring Lightning-flavor accessories. What are you carrying to conferences?

A potential pitfall of CGRectIntegral

This morning while I was checking an app for misaligned elements, I happened upon a misaligned button. (If you’re not using either the iOS Simulator or Instruments to check your app for misaligned images, you should be, but that’s a post for another day.)

Checking the code it was obvious to me where the problem was.

backButton.frame = CGRectMake(5, (navigationBar.bounds.size.height
    - imageBack.size.height)/2, imageBack.size.width,
    imageBack.size.height);

Centering code is especially prone to pixel misalignment. In this case imageBack has a size of (50, 29) while the navigationBar has a height of 44 points. The code above generates a rect with origin = (5, 7.5) and size = (50, 29). So the image ends up vertically misaligned, which in turn makes the child text label inside also misaligned, and hence they show up painted in magenta when the Color Misaligned Images option is checked in the iOS Simulator Debug menu.

This looks like a job for CGRectIntegral, right? But when I change the code to this:

backButton.frame  = CGRectIntegral(CGRectMake(5, 
    (navigationBar.bounds.size.height - imageBack.size.height)/2,
    imageBack.size.width, imageBack.size.height));

I end up with this:

The button is no longer misaligned, but it is now being stretched (hence the yellow wash). Debugging shows that CGRectIntegral has converted the input rect of (5, 7.5) x (50, 29) into (5, 7) x (50, 30). So now the image is being stretched vertically by 1 point. That might be fine for UILabel but not for an image.

The other issue with using CGRectIntegral is that the original rect is actually fine for retina devices because they have 2 pixels per point, so a value of 7.5 actually falls on a pixel boundary, and is the optimal centering for this image. If we adjusted it to origin.y = 7 (without stretching) then it would be 2 pixels closer to the top than to the bottom on a retina device.

I’ve written some helper functions to correctly pixel align rectangles (not point align) for both retina and non-retina screens, and posted them in this gist.

Under non-retina it would convert the rectangle to (5, 7) x (50,29) to pixel align it without stretching, while under retina it would leave the rectangle unmodified at (5, 7.5) x (50, 29).

This finally clears the magenta (alignment) and yellow (stretch) washes from the button:

Addendum

According to the Apple Documentation for CGRectIntegral:

A rectangle with the smallest integer values for its origin and size that contains the source rectangle. That is, given a rectangle with fractional origin or size values, CGRectIntegral rounds the rectangle’s origin downward and its size upward to the nearest whole integers, such that the result contains the original rectangle.

The fractional origin of (5, 7.5) is rounded downward to (5, 7), but I initially thought the size would be left unmodified (not rounded up) because it already comprises 2 whole integers. But that wouldn’t contain the original rectangle, whose lower right corner is positioned at (55, 36.5). In order to contain the original rectangle, the height has to be increased by 1 point from 29 to 30.

How to Add a Decoration View to a UICollectionView

Decoration views are one of the great new features of collection views.  Unlike cells and supplementary views (e.g. headers and footers), decoration views are layout-driven rather than data-driven.  You can think of them as the shelves in the iBooks Store interface.  Background views are another good candidate for implementing as decoration views.

So how exactly do you add decoration views to your collection view?  It’s actually pretty simple.

  1. Create your decoration view.  It should be a subclass of UICollectionReusableView.
  2. Create your own UICollectionViewLayout subclass if you don’t already have one.  This can be a subclass of UICollectionViewFlowLayout if that’s what you’re using.
  3. Register your decoration view with your layout either by class name or nib.
  4. Return the appropriate attributes for your decoration view in layoutAttributesForElementsInRect:
  5. Implement layoutAttributesForDecorationViewOfKind:atIndexPath: to return attributes for the specified decoration view.


In my sample project IntroducingCollectionViews, the first layout, GridLayout, is an iBooks Store-style layout derived from UICollectionViewFlowLayout.  The layout has shelves underneath each row of cells that are implemented as decoration views.  I will go through the steps above to show how I implemented the shelf views in the GridLayout class.

Create the decoration view

I created a ShelfView class derived from UICollectionReusableView.  It’s a very simple view (no subviews) — I just set backgroundColor to a color from a pattern image and add a drop shadow.  (Performance tip: I set the shadowPath for the drop shadow on the backing layer.  See here for why that’s important.)

Subclass UICollectionViewLayout

I created GridLayout as a subclass of UICollectionViewFlowLayout.  The superclass handles the heavy lifting of positioning all the cells and headers and footers, but I have to handle the decoration views.

Register the decoration view

In the init method for GridLayout I register the shelf view by class.

[self registerClass:[ShelfView class] forDecorationViewOfKind:
    [ShelfView kind]]

(Where kind is a convenience class method I added to return the kind string. Kind becomes important when you have multiple decoration view classes in your collection view.)

Implement layoutAttributesForElementsInRect:

This method is the meat of a layout.  It’s where the layout tells the collection view about all items (cells, supplementary views, and decoration views) that are to appear within a given rect (generally the current visible rect based on the collection view’s current contentOffset).  The collection view in turn takes over instantiating (or reusing) all necessary views and setting their position, size, and other visible characteristics (alpha, transform, zIndex, etc.).

Because I’m deriving from UICollectionViewFlowLayout, I can just call super to get the attributes for all the cells and supplementary views.  I just need to add the decoration views (if any) to that array.  But in order to know which decoration views might fall within a given rect, I need to do some calculations ahead of time.  To do that I need to override prepareLayout.  This is the method that gets called every time the layout becomes invalidated and is where you can calculate where all the collection elements should go.

In prepareLayout I calculate where the shelves will go (don’t forget to call super).  Unfortunately, this means replicating much of the flow layout positioning since I want to position each shelf directly under each row (line) of speakers (actually each shelf goes under the speaker name label of each SpeakerCell).  I calculate the frame of every shelf rect in the entire content area and store them in a dictionary keyed on index path where section is of course the section the shelf resides in and row is the 0-based index of the shelf within each section moving top to bottom. (This will be important when it’s time to implement layoutAttributesForDecorationViewOfKind:atIndexPath:)

Meanwhile, back in layoutAttributesForElementsInRect: I of course call super and then I enumerate through all my shelf rects and for any shelf rect that intersects with the specified rect (meaning a decoration view should appear at that position), I create a set of layout attributes for that decoration view and add it to the array of attributes returned by super.  To create the attributes I call

[UICollectionViewLayoutAttributes 
     layoutAttributesForDecorationViewOfKind:[ShelfView kind] 
                               withIndexPath:key]

Where I just pass in the kind and the index path (which happens to be the key of the dictionary I’m enumerating through).  Then I set the frame to be the rect I have stored and also set zIndex to 0 (I set zIndex to be 1 on all the cells and supplementary views to make sure they appear in front of the shelves).

Implement layoutAttributesForDecorationViewOfKind:atIndexPath:

This one is pretty easy.  Because I stored my shelf rects in a dictionary keyed on index path, I just use the passed index path to fetch the shelf rect and then I just create the attributes exactly as I did for layoutAttributesForElementsInRect:  (Actually I have yet to see this particular method ever get called.  I have a breakpoint set on it and have never had it be triggered.)

Summary

And that’s what it takes to add decoration views to a collection view.  Decoration views are a cool new feature of collection views and are just one of the improvements of UICollectionView over its predecessor for data display on iOS, UITableView.

Once again, the sample project is on GitHub here. The wood paneling backgrounds are part of a set of retina-ready repeatable assets by Glyphish.

Go forth and make amazing collection view layouts!

Hello World

I envision this as a place for me to write about topics other than code- most likely tech, LEGOs, and the iOS programming community; i.e. things I wish to write about, but which I don’t feel belong on markpospesel.com.

Want $100 off early bird registration for Renaissance?

Then I’ve got a discount code for you: use “mpospese” (my Twitter and ADN handle), or just use this direct link.  The code is good through the end of November and gets you into Renaissance for just $500.

Did I mention that there’s going to be a live concert by The Smule Band?  These are the guys behind Ocarina, Leaf Trombone, Magic Piano, and several other apps that turn iOS devices into musical instruments.  Ocarina holds a special place in my heart because using it for the first time was sort of a watershed moment for me in my career as a developer.  I had already been programming for mobile devices for 9 years at that point, but had never seen anything as creative as Ocarina – a device that transformed a phone into a multi-touch wind instrument (you blow past or into the microphone)!  I was already tinkering with the iPhone SDK at that point, but that was when I knew that I really, really wanted to focus on the iPhone platform.  Anyway, as you can tell I’m super excited to see them perform and hope to be able to chat with their team afterward.

The rest of the speaker lineup (myself included) is incredibly diverse and covers pretty much all the aspects of creating apps and running a business of creating apps in today’s market.  It’s a great time to be a developer, designer, or businessperson (or all three), and I plan on learning everything I can that week, especially in the areas that typically fall outside of my comfort zone.

Renaissance

The Art And Science Of Apps


Tim Burks and Bill Dudney are collaborating to put on a new conference for App Makers early next year in San Francisco: Renaissance.  The conference aims to be (roughly) equal parts design, business, and technology.  This is a 3-day single track conference, so you don’t have to miss anything.  The entire speaker roster has yet to be announced, but already includes folks like Daniel Pasco, Rob Rhyne, Brent Simmons, James Dempsey, Chris Clark, and Matt Drance.

I am proud to announce that I will be presenting a session on animation (the technical half) in conjunction with Phil Letourneau of Black Pixel (the design half).  I’m really excited about the session format (50/50 design/technology).

Early bird tickets are available through the end of November.  Even better, for $200 more you can get a combo Renaissance / CocoaConf ticket that is good for Renaissance plus any 2013 CocoaConf conference.  There are four confirmed dates/cities for next Spring (Chicago, DC, San Jose, and Dallas) with more planned for the Fall.

Personally I think this conference is going to be epic.  If you’re an indie, startup, or small company iOS App Maker, you’ll especially want to be there.  The main sessions look great and cover a wide variety of topics, and I’m certain all the informal breakout sessions and after hours conversations will be fantastic.

Update: Use code “mpospese” to register by November 30 and receive an extra $100 off the early bird price!

CocoaConf PDX wrap-up / Raleigh preview

Photo courtesy of Gordon Hughes

Last weekend I attended CocoaConf PDX in Portland, OR.  Dave Klein really upped his game with keynotes from Daniel Pasco and Brent Simmons, and speakers such as James Dempsey and Collin Donnell.  The event was sold out (the second one to do so I believe, the other being Chicago), so there was a good crowd of about 100 developers on hand.  As always it’s a great vibe with so many people eager to learn and share.

Recap

I presented talks on matrix transformations and collection views.  This was the 4th time I’ve given my matrix transformation talk, “Enter The Matrix: Reloaded“, and I feel like it’s really starting to hit its stride.  I revamped it in August to include a lot more information about flipping and folding animations as well as some general graphics performance tips.  Apparently it was voted the 2nd favorite session of the conference, losing out by a single vote to Jonathan Penn‘s UIAutomation talk.  I consider that a great compliment because Jonathan is a fantastic speaker and his automation talk is really a lot of fun (no, really!) and gets the crowd cheering by the end.  The slides are available here and the code is on GitHub.

My second talk, “Introducing Collection Views”, was a new talk.  I sought to cover the basics of collection views, layouts, and attributes while also covering the more advanced topics of custom layouts and animations and providing specific tips borne from personal (sometimes painful) experience.  The talk is accompanied by a sample app that displays a single collection view with five different layouts.  The slides are here and the code is on GitHub.

Next

I will be presenting at CocoaConf RTP in Raleigh, NC at the end of this month.  Tickets are still available and it looks to be another great conference.  Bill Dudney will be there (including an all-day graphics tutorial) – need I say more?

I will be presenting the same two talks for Raleigh.  I’m looking forward to the additional polish and reworking I can bring to the collection views talk for its second rendition.


Title: Introducing Collection Views

Abstract: UICollectionView, introduced in the iOS 6 SDK, is Apple’s new class for visualizing data in a grid or really any format other than a vertical list.  We’ll cover the basics and then explore the intricacies of UICollectionViewLayout,  UICollectionViewFlowLayout and related classes.  Along the way we’ll learn how to make both horizontal and vertical grids, cover flow, iPhoto-like stacks, and other custom layouts.  Apple has provided yet another tool that makes it easier and faster for you to provide rich experiences for your users – come learn how to hit the ground running with UICollectionView.  Plenty of source code will accompany the talk.


Title: Enter The Matrix: Reloaded

Abstract: Matrix transformations can make your user interfaces come to life: translate, scale, and rotate. Each on its own is relatively simple and straightforward. Yet many developers are daunted when 2 or more operations need to be combined. What if you need to rotate or zoom about an off-center (or even off-screen) point? How do you combine multiple transformations into a single animation? How do you make advanced, polished 3D animations such as folding and flipping views? Learn everything you need to know to get started with complex matrix transformations in CoreGraphics and CoreAnimation and take an in-depth look at folding and flipping animations. We’ll also cover related topics such as anti-aliasing, avoiding off-screen render passes, shadows, and rendering retina images. Tons of demos and full open-source source code provided.

I hope to see you in Raleigh at the end of the month – it’s going to be a good time!