MPFlipViewController: a page-flipping container controller


I put a project called MPFlipViewController up on GitHub. It’s a page-flipping container view controller that allows the user to flip through a series of view controllers as if they were pages in a book. It is based on the MPFlipTransition class I already have on GitHub, but instead of being just a transition between 2 views, it is a full-fledged container view controller that supports panning and swiping between pages (child view controllers). It follows the Containment API introduced in iOS 5, so it behaves as a proper container view controller similar to the system container controllers (e.g. UINavigationController, UITabBarController and UIPageViewController).

Requirements

Xcode 4.3
iOS 5
ARC

API

The API is based on the API for UIPageViewController (since they fulfill an almost identical role). There is a data source protocol that you implement to specify the previous and next pages, and a delegate protocol that you implement in order to receive feedback on whether or not a page-turn operation completed and also to optionally specify the new orientation in the event that device orientation changes (i.e. user rotates the device).

Use

To create a flip controller use the initWithOrientation: method and pass in the desired orientation (horizontal or vertical):

- (id)initWithOrientation:(MPFlipViewControllerOrientation)orientation;


To set the content use the setViewController:direction:animated:completion: method where direction indicates whether the animation should be a page flip forward or backward.

- (void)setViewController:(UIViewController *)viewController 
                direction:(MPFlipViewControllerDirection)direction 
                 animated:(BOOL)animated 
               completion:(void (^)(BOOL finished))completion;

To enable touch gestures (panning and swiping between pages) implement the MPFlipViewControllerDataSource delegate to provide the previous and next pages (if any). Return nil for either method to indicate the user is already on the first or last page.

- (UIViewController *)flipViewController:
          (MPFlipViewController *)flipViewController
      viewControllerBeforeViewController:
          (UIViewController *)viewController;

- (UIViewController *)flipViewController:
          (MPFlipViewController *)flipViewController
       viewControllerAfterViewController:
          (UIViewController *)viewController;

To be notified of whether a page turn animation completed or not, set the MPFlipViewControllerDelegate and implement the optional flipViewController:didFinishAnimating:previousViewController:transitionCompleted: method. This method is only called if the page turn was gesture-driven (i.e. in response to a pan or swipe), and not programmatic (i.e. in response to a call to setViewController:direction:animated:completion:).

- (void)flipViewController:(MPFlipViewController *)flipViewController 
        didFinishAnimating:(BOOL)finished 
    previousViewController:(UIViewController *)previousViewController 
       transitionCompleted:(BOOL)completed;

To change the orientation of the flip controller when device orientation changes, set the MPFlipViewControllerDelegate and implement the optional flipViewController:orientationForInterfaceOrientation: method and return the desired orientation.

- (MPFlipViewControllerOrientation)flipViewController:
                       (MPFlipViewController *)flipViewController 
                   orientationForInterfaceOrientation:
                       (UIInterfaceOrientation)orientation;

Demo Project

The GitHub project includes a sample project that demonstrates the use of the control and its API.

Don’t rename your .xcdatamodeld file

Ok, you can rename it but be prepared for weird bugs with Xcode 4.3 (and possibly earlier versions).  In my case I created a new Core Data model file and added it to an existing project.  Then I renamed the model file before attempting to build the project.  Yet even with a clean build and install (deleting the app from the device first), NSManagedObjectModel -initWithContentsOfURL returned nil even though my NSURL pointer was non-nil.

NSURL *modelURL = [[NSBundle mainBundle] URLForResource:@"ModelName"
    withExtension:@"momd"];
__managedObjectModel = [[NSManagedObjectModel alloc] 
    initWithContentsOfURL:modelURL];

Short answer: quit and reopen Xcode to fix the problem.

(Solution via Stack Overflow)

On the importance of setting contentsScale in CATextLayer

The retina display iPhone has been out for 2 years now, so I probably should have run into this before, but as I use CATextLayer infrequently I had not.  Anyway, if you don’t manually set the contentsScale property of your CATextLayer to the correct value, on retina devices you’ll end up with blocky pixel-doubled text like this:

However, if you call:

if ([layer respondsToSelector:@selector(setContentsScale:)])
    [layer setContentsScale:[[UIScreen mainScreen] scale]];

then you will get properly rendered text like so:


(Solution via StackOverflow.)

iOSDevCampDC 2012

I am pleased to announce that I will be speaking at iOSDevCampDC in Reston, VA on August 11.  This is a single track, single day mini-conference (for a mini price, just $50) that brings together a lot of DC-area developers.  It’s on a Saturday, so work conflicts are minimal.  Ticket sales end this Saturday (July 14), so if you’d like to go, act soon.

Update: registration has been extended until July 24.

I will be doing my “Enter The Matrix” presentation on matrix transformations, but I’ll probably fine-tune it to the more advanced audience I expect to quickly review the basics and then spend more time examining flipping and folding animations (and related ephemera such as anti-aliasing, avoiding off-screen render passes, shadows, rendering retina images, etc.)

So if you’re in the area (or will be), I hope to see you there!  (Seriously, for $50 you can’t beat the price for 6 technical sessions plus the opportunity to network with a cadre of local devs.)

CocoaConf DC wrap-up

Last weekend I had a great time at CocoaConf DC on my home turf of northern Virginia.  In many ways CocoaConf is the antithesis of WWDC.  Capped at 100 attendees, it’s small where WWDC is enormous, and intimate where WWDC can be impersonal.  It’s a conference where you can meet (and spend time chatting with) every speaker and every attendee, if you put your mind to it.  And really, although the sessions are the ostensible reason to attend conferences (the way we justify them to our bosses or to ourselves), for me at least it’s the personal connections you make that are the real value.  As developers we tend to spend most of our time isolated in our cubicles (and in some cases our homes), so it’s doubly important to take the time to reach out to the like-minded individuals we encounter at conferences.  CocoaConf is a great venue for that.  And with 3 tracks of 30 sessions over 2 days (preceded by an optional full-day intensive tutorial), there’s plenty of knowledge to be gained as well.  A common theme I heard throughout last weekend was the “which of these sessions should I attend next?  They all sound great” dilemma (trilemma?).

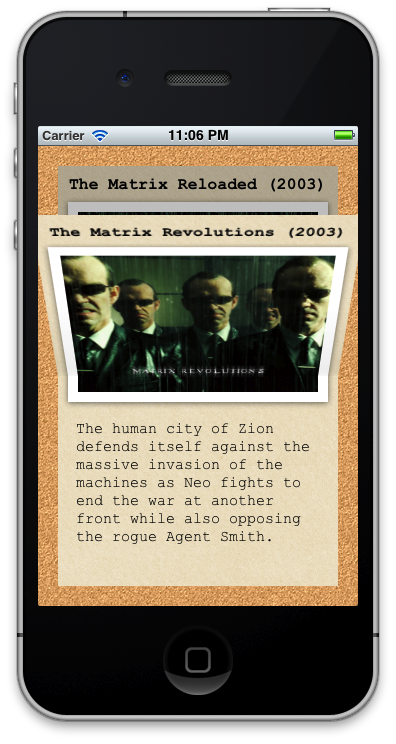
This time I presented two talks.  I debuted a talk on custom container view controllers (using the iOS 5 containment API), which in addition to containment covered the iterative process of designing and refining the UI and API for a page-flipping control (demo app shown above).  The slides are available here and the code (open source and attribution-only licensed) is up on GitHub.

My other talk, “Enter The Matrix”, I gave for the second time.  It’s about using matrix transformations in Quartz drawing, UIKit animations, and CoreAnimation (with obligatory, gratuitous references to the Matrix movies).  Since Chicago in March, I’ve significantly improved the accompanying sample app, completely revised the slides for fold and flip animations, and introduced a section on skew and perspective.  The slides are available here (latest version here) and the code is on GitHub.

I think one new talk is the most I can manage per conference.  A great deal of work goes into each presentation (code, slides, and speech).  I like this picture of Saul Mora, Scott McAlister and me all preparing for our talks on the first day of the conference.  We work on our presentations up until the last minute not because we’re ill-prepared, but rather because we care.

One little touch that I really appreciated as a speaker: a MacBook power adapter installed on the presenter’s table in each of the rooms.  Sometimes, it’s the attention to little details that really stand out.

I hear that CocoaConf may be back in DC next March.  If so, I hope I can be a part of it again, either as speaker or attendee.

Thoughts on WWDC 2012

or lessons I learned from WWDC 2011


Let me preface this post by saying that I am no WWDC veteran; last year was my first WWDC.  Jeff LaMarche and Collin Donnell (among many others) are seasoned veterans who have written guides on what to bring and what to expect.  That said, here were some of my impressions after WWDC 2011.

Trip Planning

A little late for this considering WWDC 2012 is only little more than a week away, but here goes.  You want to arrive Sunday afternoon or earlier.  You’ll want to swing by Moscone on Sunday afternoon to get your conference badge, so that you’re ready to go on Monday morning.  Also, there will be plenty of social gatherings on Sunday night (some even earlier), so it’s a good opportunity to get your networking and socializing on.  At the end of the week Friday is only a half day and for the most part is repeated sessions, so when planning your return flight, remember that you don’t necessarily need to be there all day (and in fact they will kick you out at 4:15 pm).  I live on the east coast and last year I took the red-eye back Friday night, but there was really no need for me to hang around in San Francisco until 11 pm.  This year I’m flying out in the middle of the afternoon and should be home in bed by midnight.  Considering the usual post-WWDC exhaustion, that’s infinitely better than a night on a plane (especially if you have young children who won’t have mercy on you when you finally arrive home the following morning after a week away).

Packing

Definitely pack for a carry-on.  You don’t want to deal with checked luggage either on arrival or upon your return home (when you’ll no doubt be exhausted and possibly coming down with the WWDisease).  Besides, you just need casual clothes and your tech gear, so you can pack light and keep it simple.

You don’t need to bring a t-shirt for every day.  If you’re like me, you’ll probably buy at least one t-shirt (e.g. the official WWDC 2012 shirt) and win one or more others.  Just wear the new ones to finish out the week.

It’s ok to leave your workout clothes at home.  Usually on business trips I bring workout gear and try to spend an hour a day in the hotel gym.  At WWDC though chances are you’ll be at Moscone all day in sessions and labs, in restaurants and bars fueling up, networking, or socializing in the evenings, and what little time you do spend in your hotel you’ll need for sleep, or else you’ll want to be coding (either for your boss, your clients, or just to try out some of the new shiny bits).  Exercise can be put on hold for a week.

Tech Gear

Bring wall chargers and sync cables for all your iOS devices.  Consider bringing test devices to load up iOS betas on (I rely on my phone too much to install beta 1 builds on it, especially while on the road).  Make sure your test devices are synced to your travel laptop if you want or need to have any content on them.  Expect your iPhone battery to be running low at the end of every day.  If you don’t have one, you might want to buy a rechargeable backup battery such as a mophie juice pack (I just bought this one) to top off your phone at the end of the day.  Even if you don’t need it yourself, I’m sure you’ll meet others you can offer a quick charge to.

Conference

If you’re planning on waiting in line to get into the main room for the Monday keynote, think about leaving your laptop back at the hotel on Monday (especially if it’s one of the heavier models).  You definitely won’t need it for the keynote, and your feet will thank you after you’ve been standing for 4 or more hours.  (Last year I started waiting in the keynote line at 6 am and didn’t sit down until almost 10 am and regretted bringing my laptop.)

You won’t really be able to plan out your week until after the keynote when all the TBA sessions are finally announced.  When planning which sessions to attend, note that some sessions are offered multiple times, so check to see which is the best time for you to attend a particular talk.  Consider going to labs to work with Apple engineers instead of sessions.  The session videos will be available online not long after the conference, but the labs are a unique opportunity and precious commodity.  For sure if there are issues/questions you have regarding current or future projects, seek help at the appropriate labs.  Also, if there is a new technology/API announced that week that you’re keenly interested in, make sure not just to attend the sessions on that topic but to also attend the labs.  For example, last year I really regretted not going to any iCloud labs.  The Apple iCloud engineers could probably have saved me a ton of time and trouble in the weeks just after WWDC when I was struggling with the iCloud beta bits.  So yeah, labs, labs, and more labs.

The Indie Scene

This year I’m really excited and pleased to see an indie dev scene occur in parallel to WWDC.  Indie Dev Lab and Appsterdam are both hosting workplaces and talks that week.  It’s almost enough to make me wish I had opted out of the official event just so that I could spend full time there.  Anyway, there’s definitely an alternate way to network and learn during the day outside of Moscone, and I only hope to see it grow in future years.

If you’re going to be out in San Francisco the week of June 11-15, I hope to see you around.  I’d love to have a beer or grab a bite of sushi or perhaps eat way more meat than is healthy with you.  I’m super excited for it because I love what we do.

Anatomy of a page-flip animation


In this post I would like to do a close examination of my take on the page-flip animation.  As with my foray into folding animations, this started with my desire to come up with some cool examples of real world use for matrix transformations for my Enter The Matrix presentation for CocoaConf Chicago last March (and which I’ll be delivering a new and improved version of at CocoaConf DC next month).

The Basics

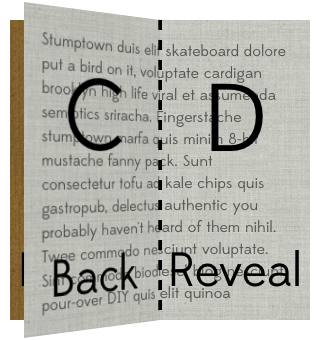
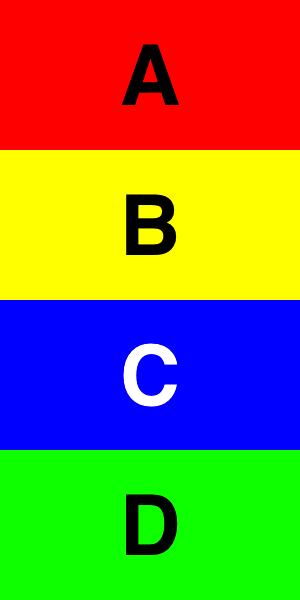
Essentially we have two views that we are transitioning between.  Each one is divided in two along either a vertical or horizontal axis and rendered as an image.  If we’re transitioning from A-B to C-D and flipping from right to left, then we will start by flipping up B (while revealing D beneath it).  At the halfway point B will disappear (and D will be fully revealed), and we will begin flipping down C and covering up D.  By the end A & B will be hidden and only C & D will remain.
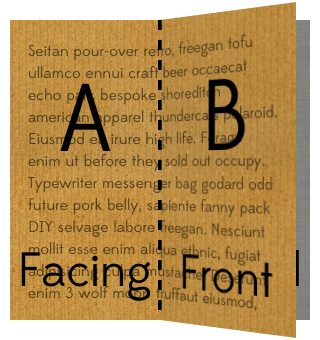


For my own purposes I refer to the half of the old view that we flip up (B) as the “front page”.  The other half of the old view that remains in place (A) I call the “facing page”.  The half of the new view that we flip down (C) is the “back page” (i.e. it’s on the back side of the page we’re flipping), and the half of the new view that stays in place (D) is the “reveal page”.  Whether one of these halves is on the left or the right (or the top or the bottom) depends of course on the direction of the flip (and its orientation), so I just like to think in terms of which ones are moving and which are not.

As described above, this is a 2-stage animation.  First we flip the front page up until it’s vertical and disappears.  Then we flip the back page down from vertical to flat.

Setting the Stage

Before we execute either stage, we need to prepare our layer hierarchy for the animation.  We will create a view with 4 sublayers where each sublayer’s content is an image rendered from a half each of the new and old views.  The layers for the facing and reveal pages go beneath the layers for the front and back pages (although we won’t add the back page to the hierarchy just yet).


The 2 lower sublayers (facing and reveal) will not need to move.  At this point we can add our animation view and hide (or remove) the old view as we’ve replaced it with a (static) copy.

Stage 1

In a right-to-left page flip, the front page is on the right.  We anchor it on its left side (the “spine” of our imagined book) and rotate it about the y axis from 0° to -90°.
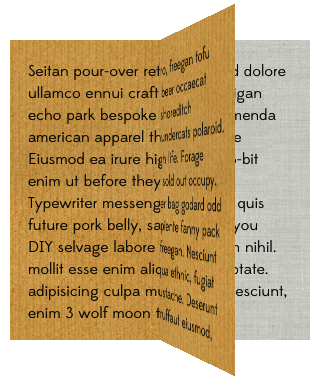
Stage 2

The back page in a right-to-left flip sits on the left and so we need to anchor it on its right side (again forming the spine in the middle of our view).  At the completion of the stage 1 animation we can remove the front page sublayer from the hierarchy and add in the back page sublayer, already pre-rotated to +90°.  (Note: because the 2 layers are anchored on opposite sides, the sign of the angle to which they need to be rotated to appear in the same position is also opposite.)
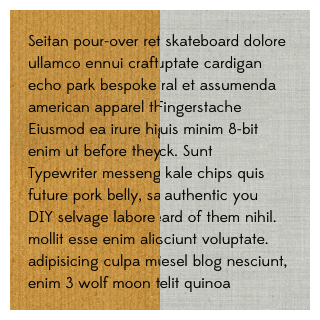

Then we simply rotate the back page to 0°.
Making it better

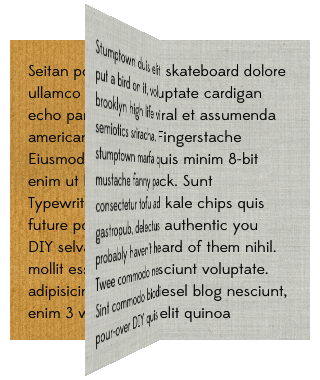
What we have so far, serves as a passable page-flip animation, but we can do better in making it more realistic.  By adding a shadow layer (a simple CALayer with background color set to black and opacity set to maybe 0.5) to the reveal page and then animating its opacity, the page beneath can be initially dark (shadowed by the front page) and then get gradually lighter as the front page moves towards vertical.  So let’s animate the opacity of the shadow layer on the reveal page from 0.5 to 0 throughout the stage 1 animation.
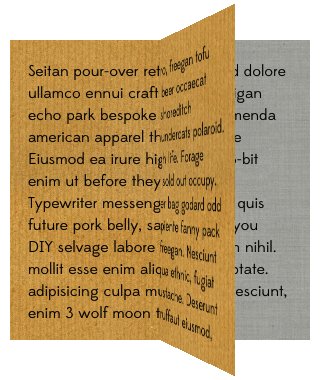

During stage 2 we can add a matching shadow layer to the facing page and animate its opacity from 0 to 0.5 as the back page lowers down on top of it to hide it.

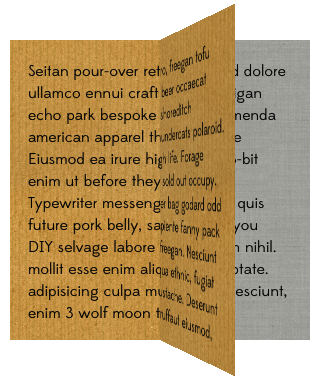
Next it would be nice to create the impression of a crease, of a differentiation between the flat facing page and the flipping front page.  This can be achieved using a shadow layer on the front page, although it doesn’t need to be as dark.  We can animate its opacity from 0 to 0.1 during the stage 1 animation.  We’ll add a similar shadow to the back page for stage 2 and animate it from 0.1 back to 0.
Thinking about the shadows

The width of the flipping page during the animation follows a cosine path (although this is slightly distorted by the viewpoint of our perspective, see below).  So for example at 50% completion of the first flip, the page is rotated to 45° but its width is cos(45°) × width, or 70.7% of the width.  If we animate the shadow on the reveal page linearly, that means the shadow would be only at 50% of its maximum even though the page is still 70% covered; i.e. the intensity of the shadow is not proportional to the width of the page covering it.  The reveal page will only be half revealed when the animation is 2/3 completed (cos(60°) = 0.5) but by then a linear shadow would be at 1/3 of its maximum.  So I decided that the shadows on the reveal and facing pages should animate along cosine and sine paths respectively to achieve a more pleasing effect (using CAKeyframeAnimation, see code).  This effectively means the shadows stay darker longer, so I also reduced their maximum opacity to 0.333.  I think it’s ok to leave the front and back page shadows as simple linear animations.

Antialiasing

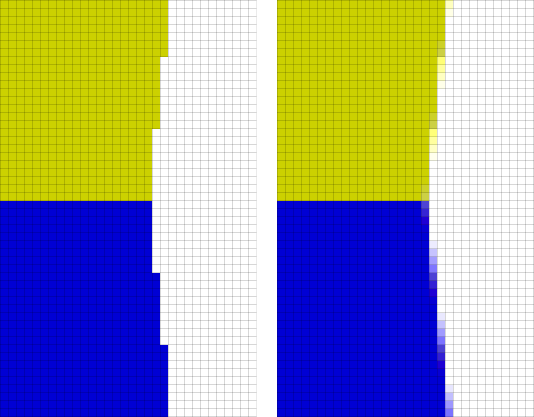
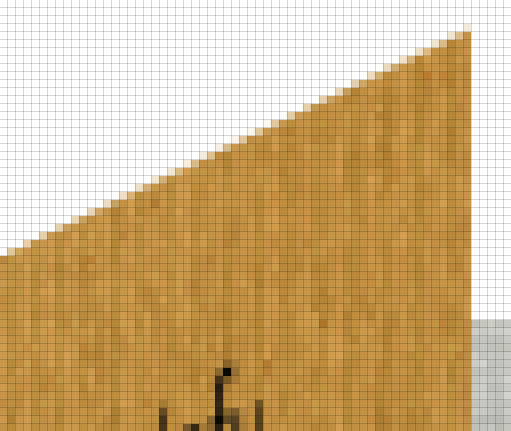
Did you notice anything wrong with the screenshots above?  There are probably several things, but one of them is the jagged edge of the flipping page.
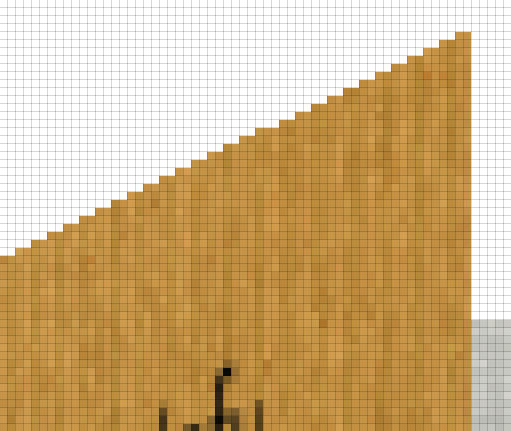

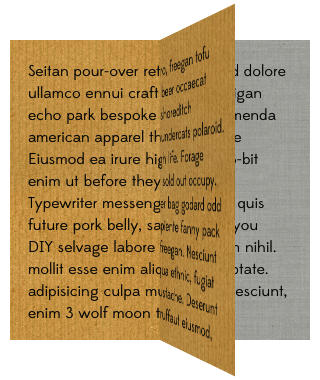
Because we’re using static images to perform our animation, it’s a simple matter to antialiase the edges in an efficient manner, which gives us this:
Thinking More About the Shadows

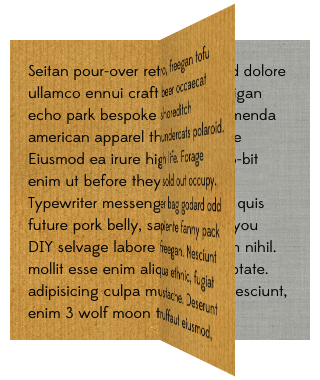
But a shadow on the front page doesn’t really make sense and darkening the entire page just to suggest a crease seems like overkill.  Instead we can use a CAGradientLayer to darken the page just near the crease, but leave the bulk of the page unmodified.  We’ll keep the animation on the shadow layer’s opacity to ease the effect in (alternatively, we could animate the gradient’s colors by increasing their alpha).
Timing Curves

Because this is a 2 stage animation, we need to pay some attention to the timing curves.  While we may want an Ease In Ease Out timing curve over the entire animation, that means using an Ease In curve over the first half and an Ease Out curve over the second half.  If we Ease In and Out over each half, we will end up with an uncomfortable pause in the middle of our page flip.  (Ok, it would probably only be uncomfortable to me having to watch such an animation but still.)

Perspective

For our animation to appear 3d at all, we will need to set the m34 component (skew) of the main layer’s transform.  If we don’t, our page flip will be completely flat and rather odd looking.
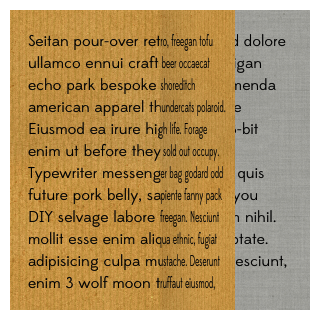
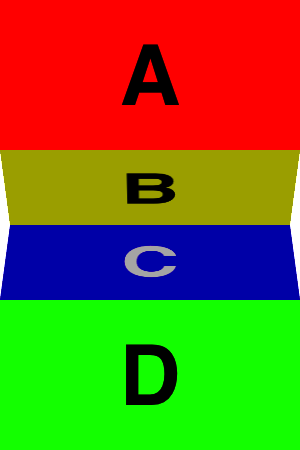
No perspective: m34 = 0

Skew is defined as – 1 / z where z is the height of the viewer in points above the flat plane of the view.  Choosing the right skew will be dependent upon the dimensions of the views you are animating.  Your skew should be proportional to your page width (horizontal flip) or height (vertical flip).  If z it too low, your page animation will be blown out of proportion.
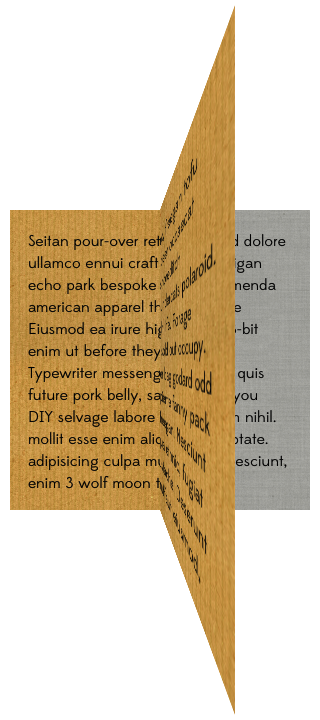
Too much perspective: m34 = -1/225 or -1/(1.5 × page width)

If z is too high, your page animation won’t have enough “pop” to it.
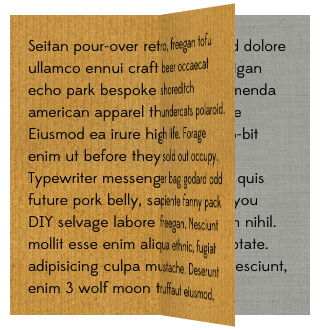
Too little perspective: m34 = -1/1800 or -1/(12 × page width)

I find that anything in the range of 4-5 × width works pretty well for z, but you can experiment and adjust the animation to your taste.

Inverse perspective

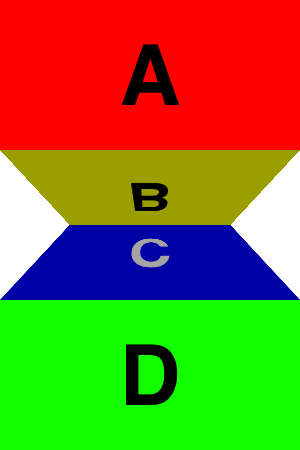
If you invert your perspective (use a positive value instead of the typical negative one), you can get a pretty cool effect.  It doesn’t really make physical sense as a page-flip illusion, but is nonetheless interesting.  (Note:I’ve removed the shadow on the reveal page for this effect.)
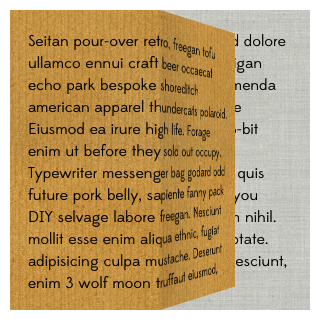
Anchor Point

The anchor point of the layer being animated determines the view point of the perspective.  By default the anchor point is {0.5, 0.5} which corresponds to the midpoint of the layer.  That’s why the flipping page sticks out an equal distance above and below.  But if we change our anchor point, we could also change our perspective on our animation and thus alter its look and feel.
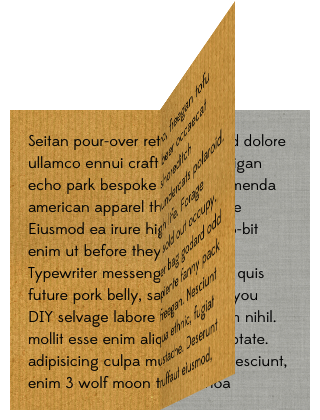
View from below – Anchor Point {0.5, 1.5}
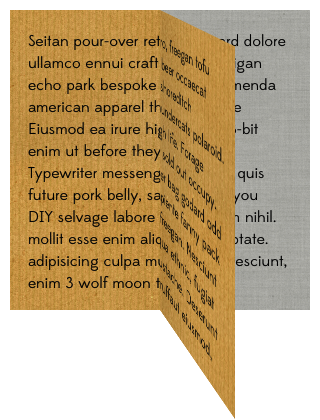
View from above – Anchor Point {0.5, -0.5}

Room for Improvement

And now we have a fairly decent page-flip animation.  We could probably improve it further by adding realistic shadows for the front and back pages to cast upon the reveal and facing pages respectively (instead of a uniform shadow).  We could just set shadow properties on some of the sublayers, but that would involve a separate off-screen rendering pass, so we would need to also set the shadowPath appropriately and animate that.  A possible compromise improvement might be to use a CAGradientLayer (darkest by the edge of the covering page) for the reveal and facing page shadows and animate locations (or startPoint and endPoint).

Resources

  • MPFlipViewController – a fully touch gesture-enabled, attribution-licensed container controller, that uses all of the techniques discussed above.
  • MPFoldTransition project with demo app and code you are free to use to easily add these same animations to your own iOS apps.
  • Enter The Matrix project with lots of matrix transformation examples, including touch gesture-enabled versions of both flip and fold animations (the project has now been updated to incorporate the shadow techniques described above).
  • Edge Antialiasing post with a discussion of what it is, why you’d want to do it, and how to do it efficiently.  Also with its own sample project.
  • If you’re not doing WWDC this year, come see me speak about these types of things at CocoaConf DC (and learn from a great speaker lineup).

Credits

I’d like to thank Shawn Welch for starting me down the path of investigating page-flip animations at the Voices That Matter iOS conference in Boston last November, and providing a demo project to get me going.

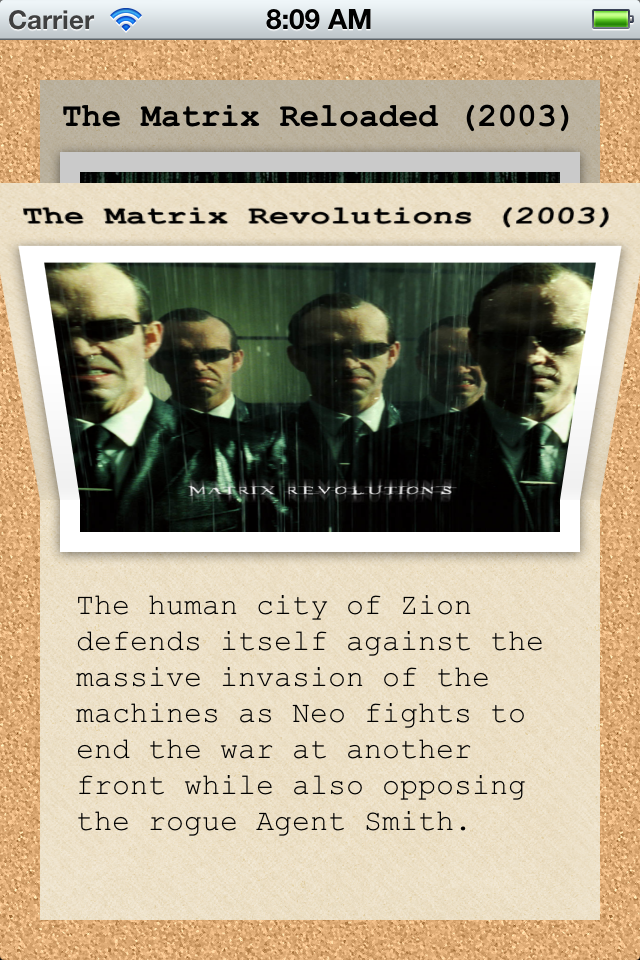
MPFlipTransition – add flip transitions to your app


I’ve added flip transitions to my MPFoldTransition project on GitHub. It provides a class you can use to add a page-flipping transition to your application in just a single line of code (in most cases).

Update: For a touch gesture-enabled container controller with page-flipping (not just a transition), see MPFlipViewController.

Features

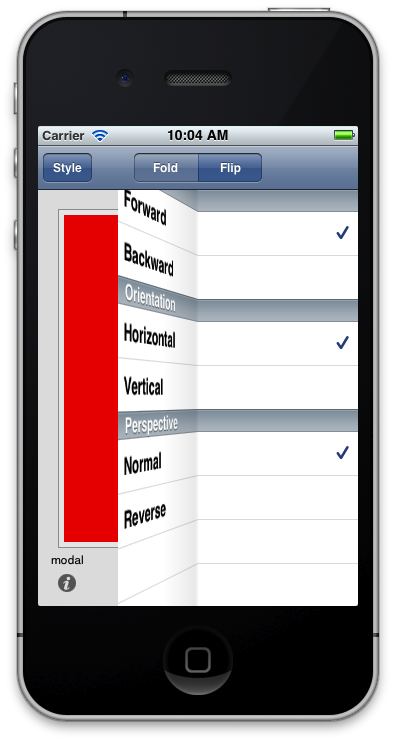
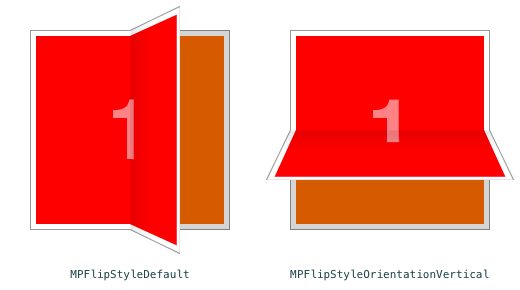
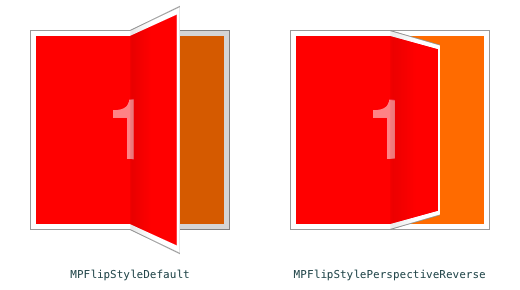
There are 3 style bits that can be combined to create 8 different animations.

Direction


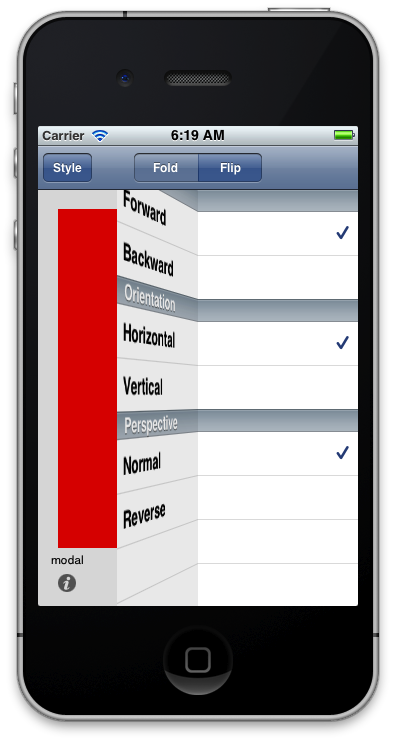
Controls whether the page flips from right to left (Forward) or left to right (Backward).

Orientation


Sets whether the page flip is horizontal or vertical.

Perspective


Determines whether the page flips towards the user (Normal) or away from the user (Reverse).

Present a modal view controller

There are extension methods to UIViewController to present or dismiss modal view controllers using flip transitions:

- (void)presentViewController:(UIViewController *)viewControllerToPresent
                    flipStyle:(MPFlipStyle)style 
                   completion:(void (^)(BOOL finished))completion;

- (void)dismissViewControllerWithFlipStyle:(MPFlipStyle)style 
                                completion:(void (^)(BOOL finished))completion;

From your UIViewController subclass you would call this to present your modal view controller:

[self presentViewController:modalViewController
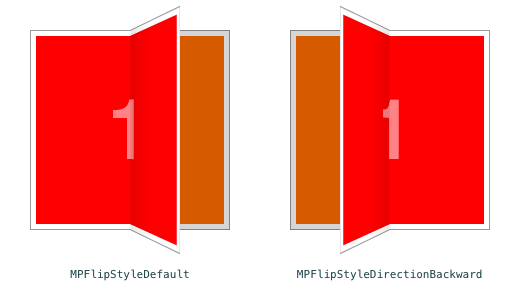
                  flipStyle:MPFlipStyleDefault 
                 completion:nil];

And then call this to dismiss it:

[self dismissViewControllerWithFlipStyle:MPFlipStyleDirectionBackward 
                              completion:nil];

Tip: dismiss your modal controller using a style with the opposite direction bit (Forward or Backward), so that you get the reverse animation.

Push a view controller onto a navigation stack

There are extension methods to UINavigationController to push or pop a view controller using flip transitions:

- (void)pushViewController:(UIViewController *)viewController
                 flipStyle:(MPFlipStyle)style;

- (UIViewController *)popViewControllerWithFlipStyle:
    (MPFlipStyle)style;

From your UIViewController subclass you would call this to push a new view controller onto the stack:

[self.navigationController pushViewController:detailViewController
                                    flipStyle:MPFlipStyleDefault];

And then call this to pop it back off:

[self.navigationController popViewControllerWithFlipStyle:MPFlipStyleDirectionBackward];

Tip: pop your view controller using a style with the opposite direction bit (Forward or Backward) from the style used to push it onto the stack, so that you get the reverse animation.

Transition between any 2 views or controllers

MPFlipTransition has class methods for generic view and view controller transitions:

+ (void)transitionFromViewController:(UIViewController *)fromController
                    toViewController:(UIViewController *)toController
                            duration:(NSTimeInterval)duration
                               style:(MPFlipStyle)style
                          completion:(void (^)(BOOL finished))completion;

+ (void)transitionFromView:(UIView *)fromView
                   toView:(UIView *)toView
                 duration:(NSTimeInterval)duration
                    style:(MPFlipStyle)style
         transitionAction:(MPTransitionAction)action
               completion:(void (^)(BOOL finished))completion;

If you really need to get under the hood (e.g. to adjust the timing curve, shadow effects, or skew), you can initialize your own instance of MPFlipTransition, set the properties as desired, and then call the perform: method to execute the transition.

Storyboard support

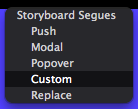
You can even incorporate modal or navigation stack flip segues without writing a single line of code! Simply use 1 of the 3 custom UIStoryboardSegue subclasses that are included. These cover modal presentation and push/pop to a navigation stack. Just create a segue between 2 controllers in your storyboard, select Custom as the segue type, then enter MPFlipModalSegue, MPFlipNavPushSegue, or MPFlipNavPopSegue as the Segue Class.

Demo project

The GitHub project includes a sample project that demonstrates the use of all the different API’s as well as all of the transition styles.

iOS version

iOS 5-only because I wrote it with ARC and included storyboard support.

Anatomy of a folding animation

In this post I want to dive into the minutiae of how a good-looking folding animation can be achieved, and also how I was doing it wrong the first time I took a stab at creating one.  Earlier this year I started looking into fold animations as an example of advanced use of matrix transforms to animate views for my Enter The Matrix presentation for CocoaConf Chicago.

(For a similar in-depth look at page-flip animations see Anatomy of a page-flip animation.)

Initial Efforts


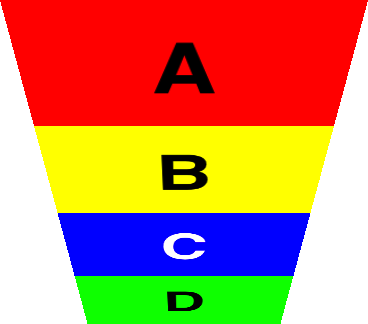
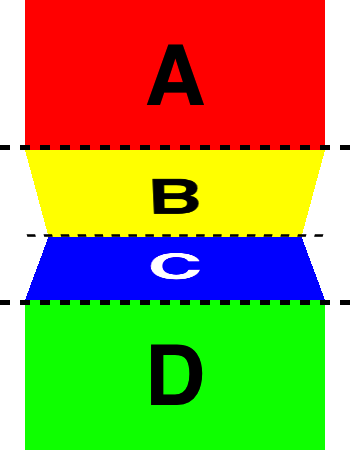
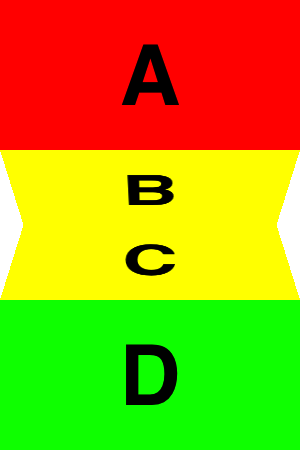
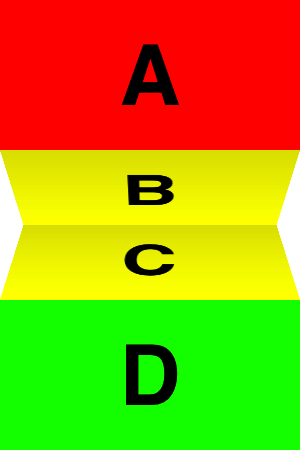
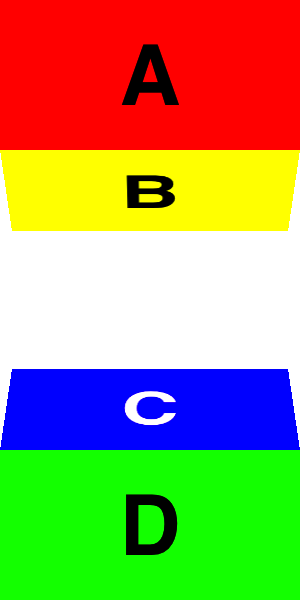
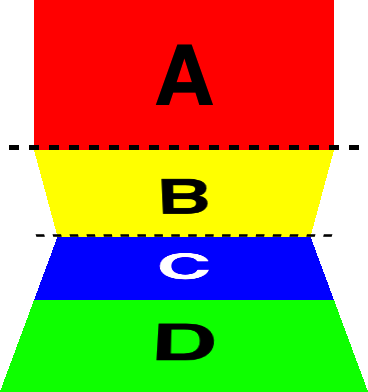
It seemed relatively straight-forward.  Given 4 “panels” (A,B,C,D if you will), fold B & C inward until they disappear while sliding A & D together until they meet.  So the first step was rotating B around the x-axis away from the user along its top edge, and the same for C except along its bottom edge.

Of course that leaves a gap between B & C, so you need to move B down and C up by just the right amount and also move A & D to keep pace with them.  I quickly discovered that the height of panels B & C during rotation is a cosine function of the angle of rotation and not linear.  However, due to perspective issues B & C don’t disappear (are completely on edge) at 90° the way you would expect.  Because you are simultaneously translating and rotating the panels, at 90° the panels are actually slightly over rotated relative to the viewer.  To get them to just disappear, you need to rotate them to arctan((z × 2) / y) where z is the height of the viewer (see perspective below) and y is the height of the panel (or roughly 83.9° in my case).  So you have to rotate the panels from 0 to 83.9° while animating the vertical offset of panels A-D from 0 to cos(±90°) × height.  This roughly works, but if you examine the animation closely, you either see a small gap open between 2 of the 4 panels or else an overlap of a few pixels between 2 of the panels.

Enter CATransformLayer

It turns out, I was thinking about this all wrong.  What I needed to use in order to keep all 4 of my panels together was CATransformLayers.  I was pointed in the right direction by this StackOverflow answer.  As Apple’s documentation says, “CATransformLayers are used to create true 3D layer hierarchies”.  Instead of treating all 4 panels as separate UIViews that need to be transformed independently, we will create the panels as 4 sublayers that are organized together along with CATransformLayers into the proper sublayer hierarchy within a single UIView.  The transform layers keep each panel layer properly adjoined to its neighbors.  To follow along with code, see my MPFoldTransition project (which was the culmination of this dive into folding animations), but in this post here I’ll be talking more about the big picture rather than code details.

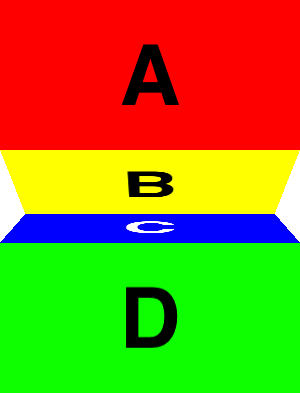
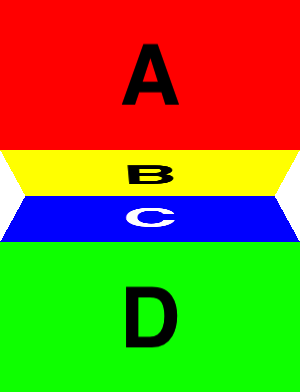
I ended up building a layer hierarchy with all 4 panels contained within a single view, and panels B & C (the 2 folding panels) contained within the bounds of a single parent layer (the purpose of which will become clear in a bit).  The difference is that now all these layers are connected together relative to one another in a true 3D hierarchy, so when I rotate panel B away from the user, all 4 panels rotate like so:


In order to compensate for this rotation and to keep panel A flat, I need to rotate panel A in the opposite direction along its bottom edge by the same amount.


Then panel C needs to be rotated towards the user by double the angle of rotation of panel B.


And finally in order to remain flat, panel D needs to be rotated away from the user by the angle of rotation of panel B.  Notice how panels A & D need to be rotated just so that they appear to remain flat throughout the entire animation.  This is of course because each panel is being rotated relative to its parent layer and not relative to the plane of the entire view.

Perspective

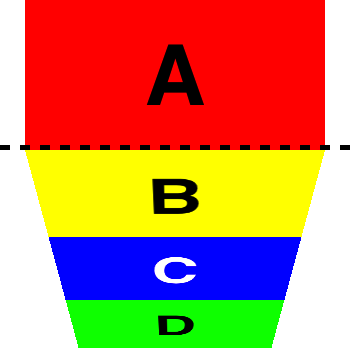
This gives us all 4 panels well-connected with no gaps or overlaps, but we’re still not finished.  If you look at the last 2 pictures above you may notice a perspective issue; i.e. that panels B & C are not of equal height.  It’s more noticeable the closer you get to 90°.


This is a perspective issue similar to the one I faced in my original design.  To fix it, at the same time we animate the rotation of these 4 panels, we need to also animate the height of the 2 folding panels B & C to 0.  This keeps the 2 panels of equal height throughout the animation.  If you wish for the border between B & C to remain in a fixed position vertically (as I did), then you actually need to animate the height using a cosine curve rather than a simple linear one (see the code for the CAKeyframeAnimation implementation).

Shadows


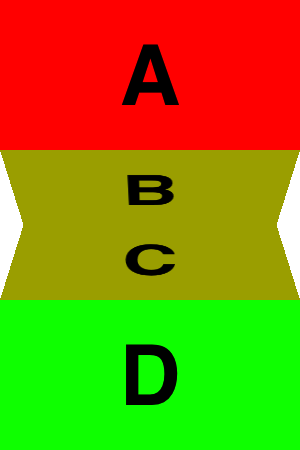
Now that perspective is tackled, the next issue is one of improving the 3D illusion by dimming the folding panels as they collapse.  This is easily achieved by adding a sublayer to each folding panel layer and animating its opacity.


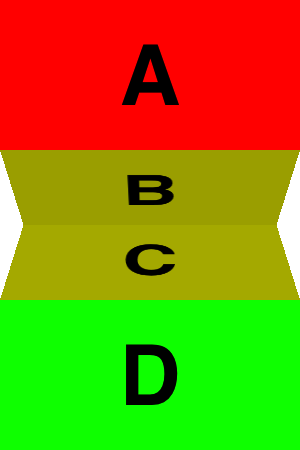
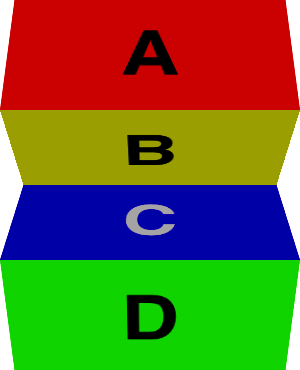
This helps, but when the 2 folding panels have the same background color (as they usually do), then they seem to be a single panel (morphing into an hourglass shape instead of folding away from us), which detracts from the 3D illusion.  To solve this, I adjusted the maximum opacity of the 2 shadow layers to be slightly different (set one  to be 90% of the other).  This provides a nice contrast between the 2 folding panels as seen here:

The proper (amount of) perspective

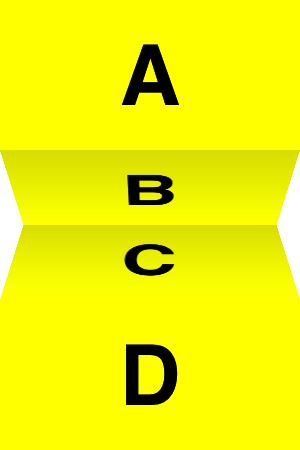
The perspective value that you set as the m34 component of your CATransform3D struct is = -1/z where z is the height of the viewer in points from the view’s surface.  Changing this value dramatically affects the illusion of perspective.  If 0 (z approaching infinity), everything is flat.

No perspective: m34 = 0

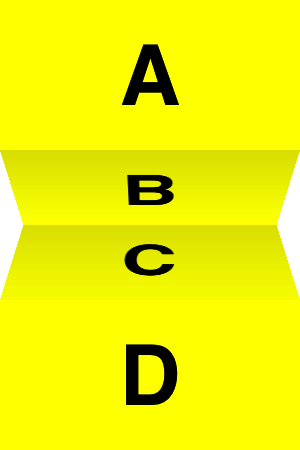
If too small (viewer still too far away) then the perspective is too subtle.

Too little perspective: m34 = -1/1800 or -1/(12 × height)

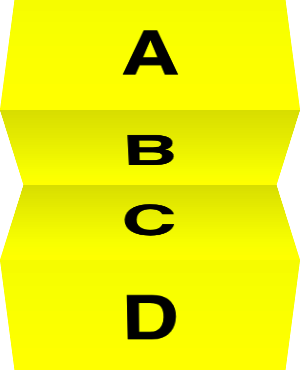
If too large (viewer too close) then the perspective is exaggerated and distorted

Too much perspective: m34 = -1/150 or -1/(1 × height)

I prefer to adjust z relative to the dimension of the objects I am animating. In this case I’ve been happy with 4.666667 × height. I think any value in the range from 4 to 5 yields attractive results.
Other Minutiae

Of course being the OCD-type, I just had to antialiase the edges of the folding panels so that they’re not jagged, even though my default animation duration is only 300 ms.


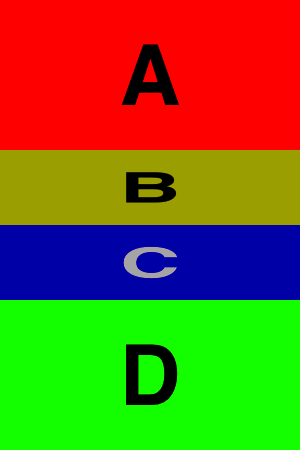
A different cool effect (which I termed “cubic” for wont of a better description) can be achieved if you rotate panels A & D at a fixed 90° angle relative to their neighbors instead of animating them to remain flat.  The effect is akin to rotating a block- one side appears while another disappears.


If the folding panels (B & C) are created by splitting a single view in 2, and that view has an odd height (in pixels, not points) then once again you see flickering of gaps between panels during the animation. To solve this I make both panels of integer pixel height. e.g. when splitting a view 99 pixels tall, I’ll make the panels 50 and 49 pixels tall instead of 49.5. (Note that on a Retina display 49.5 points is just fine because that’s really 99 pixels.)
Update: Gradient Shadows

I recently switched to using CAGradientLayers for the shadows.  I think these look much better than the solid color shadows, and they also create the impression of a crease between the two folding panels (because the light end of one gradient will be juxtaposed with the dark end of the other).

However, if the bottom sleeve (D) has the same background color as the lower folding panel (C), you end up with no crease if the gradient shadow blends all the way to clear.

Fixing this is simple – just set the end color of the lower gradient to around [[UIColor blackColor] colorWithAlphaComponent:0.25] instead of clear.  This will create enough color difference to suggest a crease while not darkening the lower panel overly much.

This isn’t necessary for the cubic effect, because then panels A and D will have their own shadow gradients.

To achieve the proper effect, I animate the opacity of the shadows on panels B & C along a cosine path so that their intensity is (inversely) proportional to the height of the panel.  For the cubic effect, the shadows on panels A & D are similarly animated along a sine path (again so as to be inversely proportional to panel height).  Using a simple linear animation would lead to a discrepancy between the strength of the shadows and the positions of the panels.

Resources

  • MPFoldTransition project with demo app and code you are free to use to easily add these same animations to your own iOS apps.
  • Enter The Matrix project with lots of matrix transformation examples, including both flip and fold animations (the project has now been updated to incorporate the techniques described above).
  • Edge Antialiasing post with a discussion of what it is, why you’d want to do it, and how to do it efficiently.  Also with its own sample project.
  • If you’re going to be on the East coast in June, come see me speak about these types of things at CocoaConf DC (and of course learn from a great lineup of even better speakers).

MPFoldTransition – add fold transitions to your app


I’ve put a project I call MPFoldTransition up on GitHub. It provides a class you can use to add a fold transition to your application in just a single line of code (in most cases).
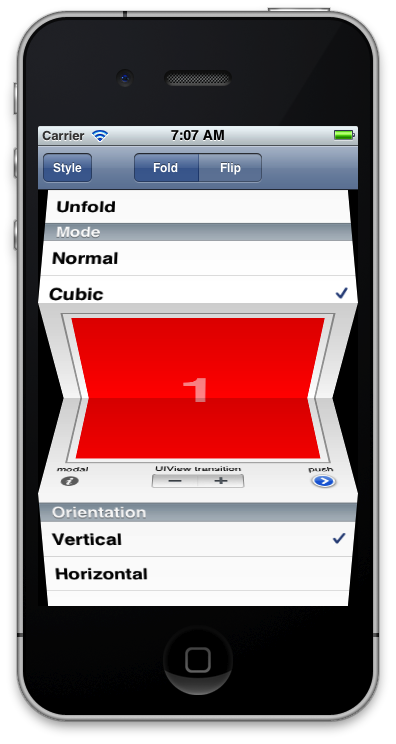
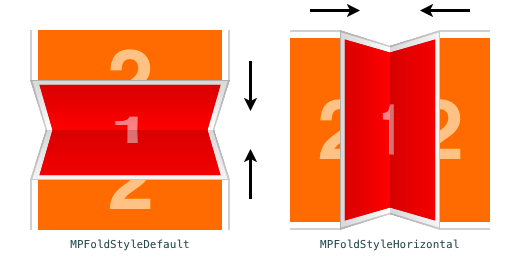
What is a fold transition? It’s an animation such as shown above (or as popularized by the Clear todo list app) where an object folds in upon itself until it disappears and the content surrounding it moves in to fill the gap. Except in this case, I’m doing it for an entire UIView or UIViewController and not just a single UITableViewCell. (For an in-depth analysis of what goes into making a folding animation, read my post here.)

Update: The GitHub project now includes flip transitions as well!

Update 2: The folding effect has been improved with gradient shadows.

Update 3: For a touch gesture-enabled container controller with page-flipping (not just a transition), see MPFlipViewController.

Features

There are 3 style bits that can be combined to create 8 different animations.

Direction


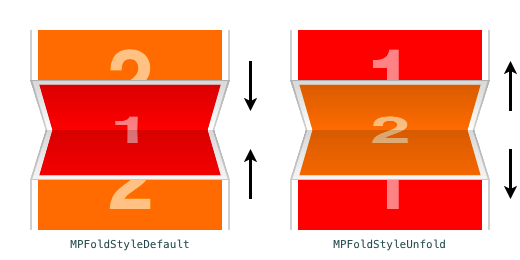
Controls whether the current view collapses inward (Fold) or if the next view expands outward (Unfold).

Mode


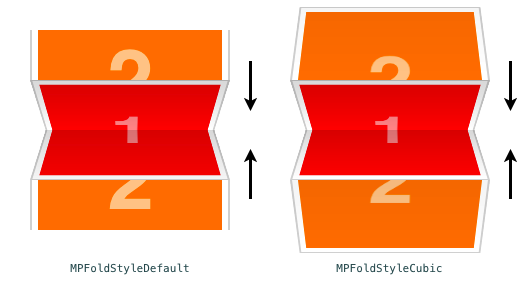
Determines whether the next view slides in flat (Normal) or rotates in at right angles to the collapsing halves of the previous view (Cubic).

Orientation


Sets whether the fold is vertical or horizontal.

Present a modal view controller

There are extension methods to UIViewController to present or dismiss modal view controllers using fold transitions:

- (void)presentViewController:(UIViewController *)viewControllerToPresent
                    foldStyle:(MPFoldStyle)style 
                   completion:(void (^)(BOOL finished))completion;

- (void)dismissViewControllerWithFoldStyle:(MPFoldStyle)style 
                                completion:(void (^)(BOOL finished))completion;

From your UIViewController subclass you would call this to present your modal view controller:

[self presentViewController:modalViewController
                  foldStyle:MPFoldStyleDefault 
                 completion:nil];

And then call this to dismiss it:

[self dismissViewControllerWithFoldStyle:MPFoldStyleUnfold 
                              completion:nil];

Tip: dismiss your modal controller using a style with the opposite fold bit (Fold or Unfold), so that you get the reverse animation.

Push a view controller onto a navigation stack

There are extension methods to UINavigationController to push or pop a view controller using fold transitions:

- (void)pushViewController:(UIViewController *)viewController
                 foldStyle:(MPFoldStyle)style;

- (UIViewController *)popViewControllerWithFoldStyle:
    (MPFoldStyle)style;

From your UIViewController subclass you would call this to push a new view controller onto the stack:

[self.navigationController pushViewController:detailViewController
                                    foldStyle:MPFoldStyleDefault];

And then call this to pop it back off:

[self.navigationController popViewControllerWithFoldStyle:MPFoldStyleUnfold];

Tip: pop your view controller using a style with the opposite fold bit (Fold or Unfold) from the style used to push it onto the stack, so that you get the reverse animation.

Transition between any 2 views or controllers

MPFoldTransition has class methods for generic view and view controller transitions:

+ (void)transitionFromViewController:(UIViewController *)fromController
                    toViewController:(UIViewController *)toController
                            duration:(NSTimeInterval)duration
                               style:(MPFoldStyle)style
                          completion:(void (^)(BOOL finished))completion;

+ (void)transitionFromView:(UIView *)fromView
                   toView:(UIView *)toView
                 duration:(NSTimeInterval)duration
                    style:(MPFoldStyle)style
         transitionAction:(MPTransitionAction)action
               completion:(void (^)(BOOL finished))completion;

If you really need to get under the hood (e.g. to adjust the timing curve), you can initialize your own instance of MPFoldTransition, set the properties as desired, and then call the perform method to execute the transition.

Storyboard support

You can even incorporate modal or navigation stack fold segues without writing a single line of code! Simply use 1 of the 3 custom UIStoryboardSegue subclasses that are included. These cover modal presentation and push/pop to a navigation stack. Just create a segue between 2 controllers in your storyboard, select Custom as the segue type, then enter MPFoldModalSegue, MPFoldNavPushSegue, or MPFoldNavPopSegue as the Segue Class.

Demo project

The GitHub project includes a sample project that demonstrates the use of all the different API’s as well as all of the transition styles.

iOS version

iOS 5-only for now because I wrote it with ARC and included storyboard support.